

How to Log into the New System
Step 1: Logging into the New System
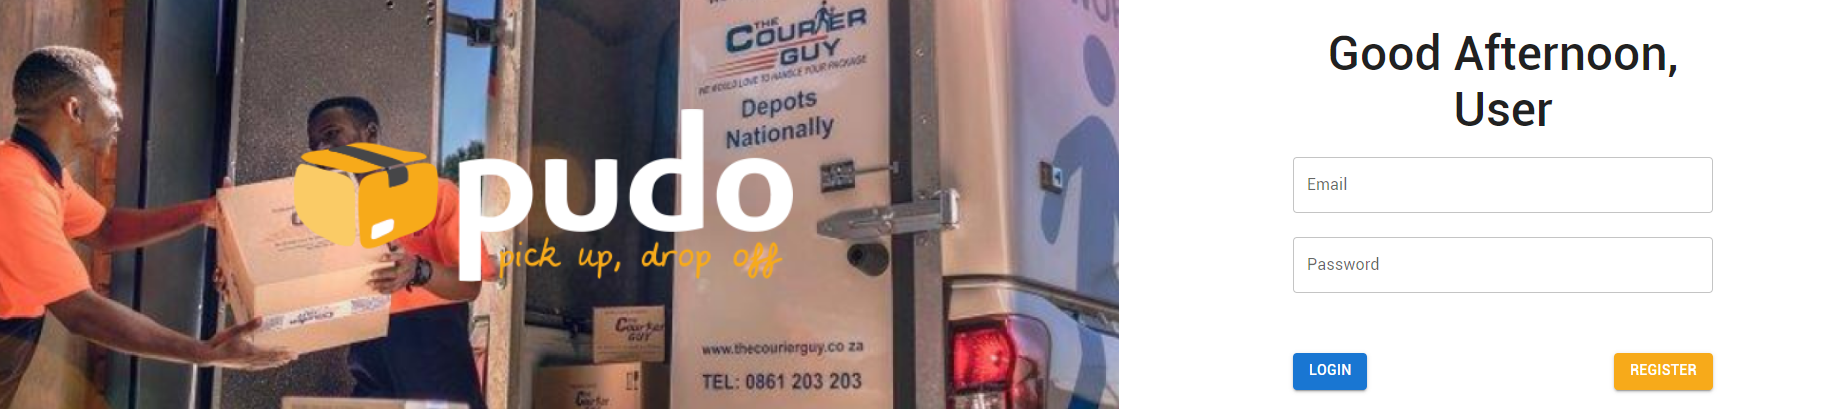
To log into the new system, follow these steps:
- Go to the login page at:
Testing: https://sandbox.pudo.co.za
Live: https://customer.pudo.co.za - Enter your username and password.
- Click the "Log In" button.
Step 2: Generating a New API Key
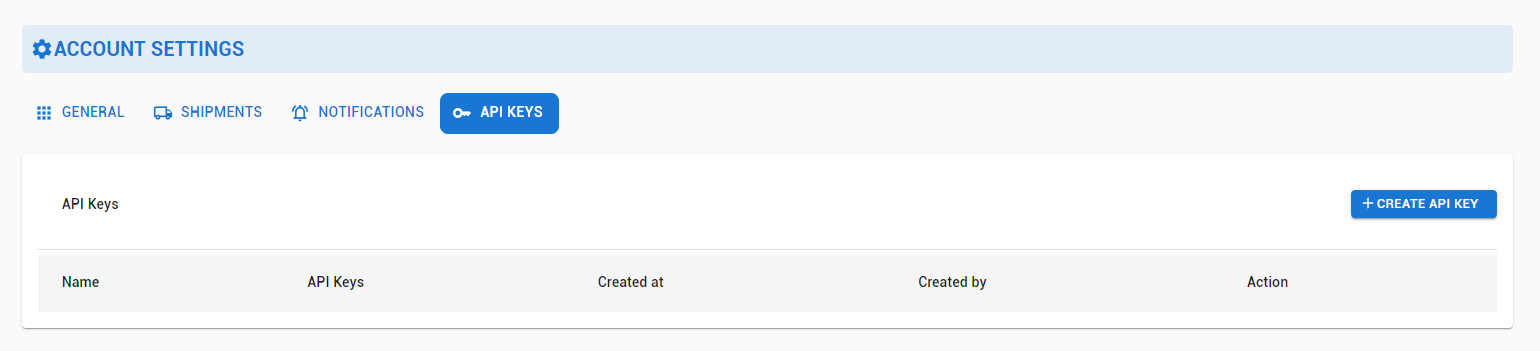
Once logged in, follow these steps to generate a new API key:
- Navigate to Settings.
- Click on the API keys section in your account settings.
- Click on the "Create API Key" button.
- Copy the generated API key and store it securely.
Download the PUDO Shipping for Woocommerce Plugin here
- Install and activate the plugin as you would any Wordpress plugin.
Phase 1
- Navigate to Settings -> Pudo-Woocommerce Config
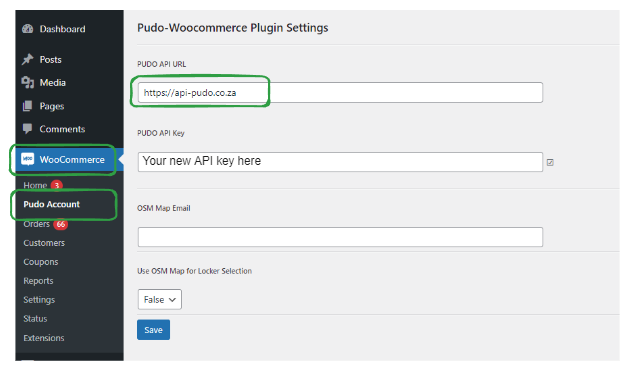
PUDO API URL
Testing: https://sandbox-api.pudo.co.za
Live: https://api-pudo.co.za
PUDO API Key
Your API Key Generated from the Portal
OSM Map Email
This can be left blank
Use OSM Map for Locker Selection
This must be always TRUE.
SAVE
Phase 2
- Navigate to Woocommerce -> Settings
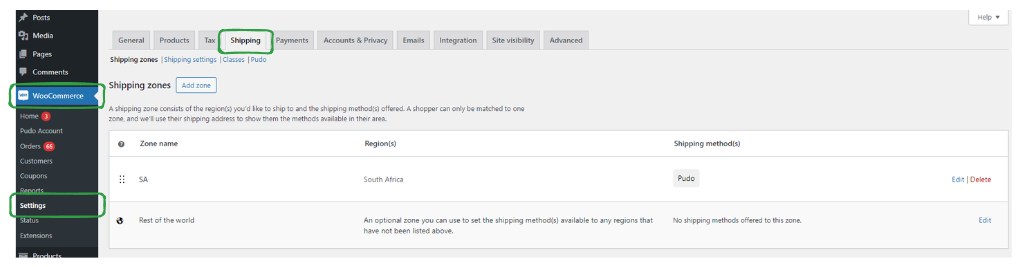
- Navigate to the Shipping Tab
- Add a Shipping Zone
- Zone Name = South Africa, Zone Region = South Africa
- Add Shipping Method
- Select "PUDO" on the dropdown menu and click "Add Shipping Method"
- Hover over "PUDO" and click "Edit"
- A PUDO Plugin config page will appear.
Shipping Method Title
PUDO
Tax Status
Taxable - A tax breakdown of the shipping cost will be displayed on the invoice.
None - A tax breakdown will not be displayed on the invoice. (Shipping costs will be displayed incl Tax)
Select locker or address as source
Will your parcels be collected from a Locker or Street address?, please choose one that applies. If you select "Street Address", Address Fields will appear at the bottom of the page.
If you select "Locker", choose your preffered lockers below:
PUDO Locker Source 1
Select the Locker you usually use.
PUDO Locker Source 2
Select your second preffered Locker.
PUDO Locker Source 3
Select your third preffered Locker.
Generic waybill description
When enabled, a generic product description will be shown on the waybill.
Enable WooCommerce Logging
Check this to enable WooCommerce logging for this plugin. Remember to empty out logs when done.
Enable locker to locker special
IMPORTANT for Special Pricing currently running
Check this to enable the Locker to Locker promotion. XS: R50.00. Small, Medium, Large, Extra Large: R60.
Name of Shop Contact
Shop Contact Name
(Example: Bob Smith)
Email of Sender
Shop Contact Email
(Example: bobsmith@shop.com)
Phone of Sender
Shop Contact Cell - Important for PUDO deposit pins
(Example: 0712345678)
PUDO Shopify
Please download the PUDO Shopify plugin here: PUDO SHOPIFY
How to Log into the New System
Step 1: Logging into the New System
To log into the new system, follow these steps:
- Go to the login page at:
Testing: https://sandbox.pudo.co.za
Live: https://customer.pudo.co.za - Enter your username and password.
- Click the "Log In" button.
Step 2: Generating a New API Key
Once logged in, follow these steps to generate a new API key:
- Navigate to Settings.
- Click on the API keys section in your account settings.
- Click on the "Create API Key" button.
- Copy the generated API key and store it securely.
Table of Contents
- First Install
- Testing the Configuration
First Install
1. Install the PUDO App
Install the PUDO app on your Shopify site by clicking here. Click the "Install" button. If you have multiple Shopify sites linked to your account, select the relevant website first. Once your dashboard appears, click the "Install" button again. After installation, you will be redirected to the PUDO settings page.

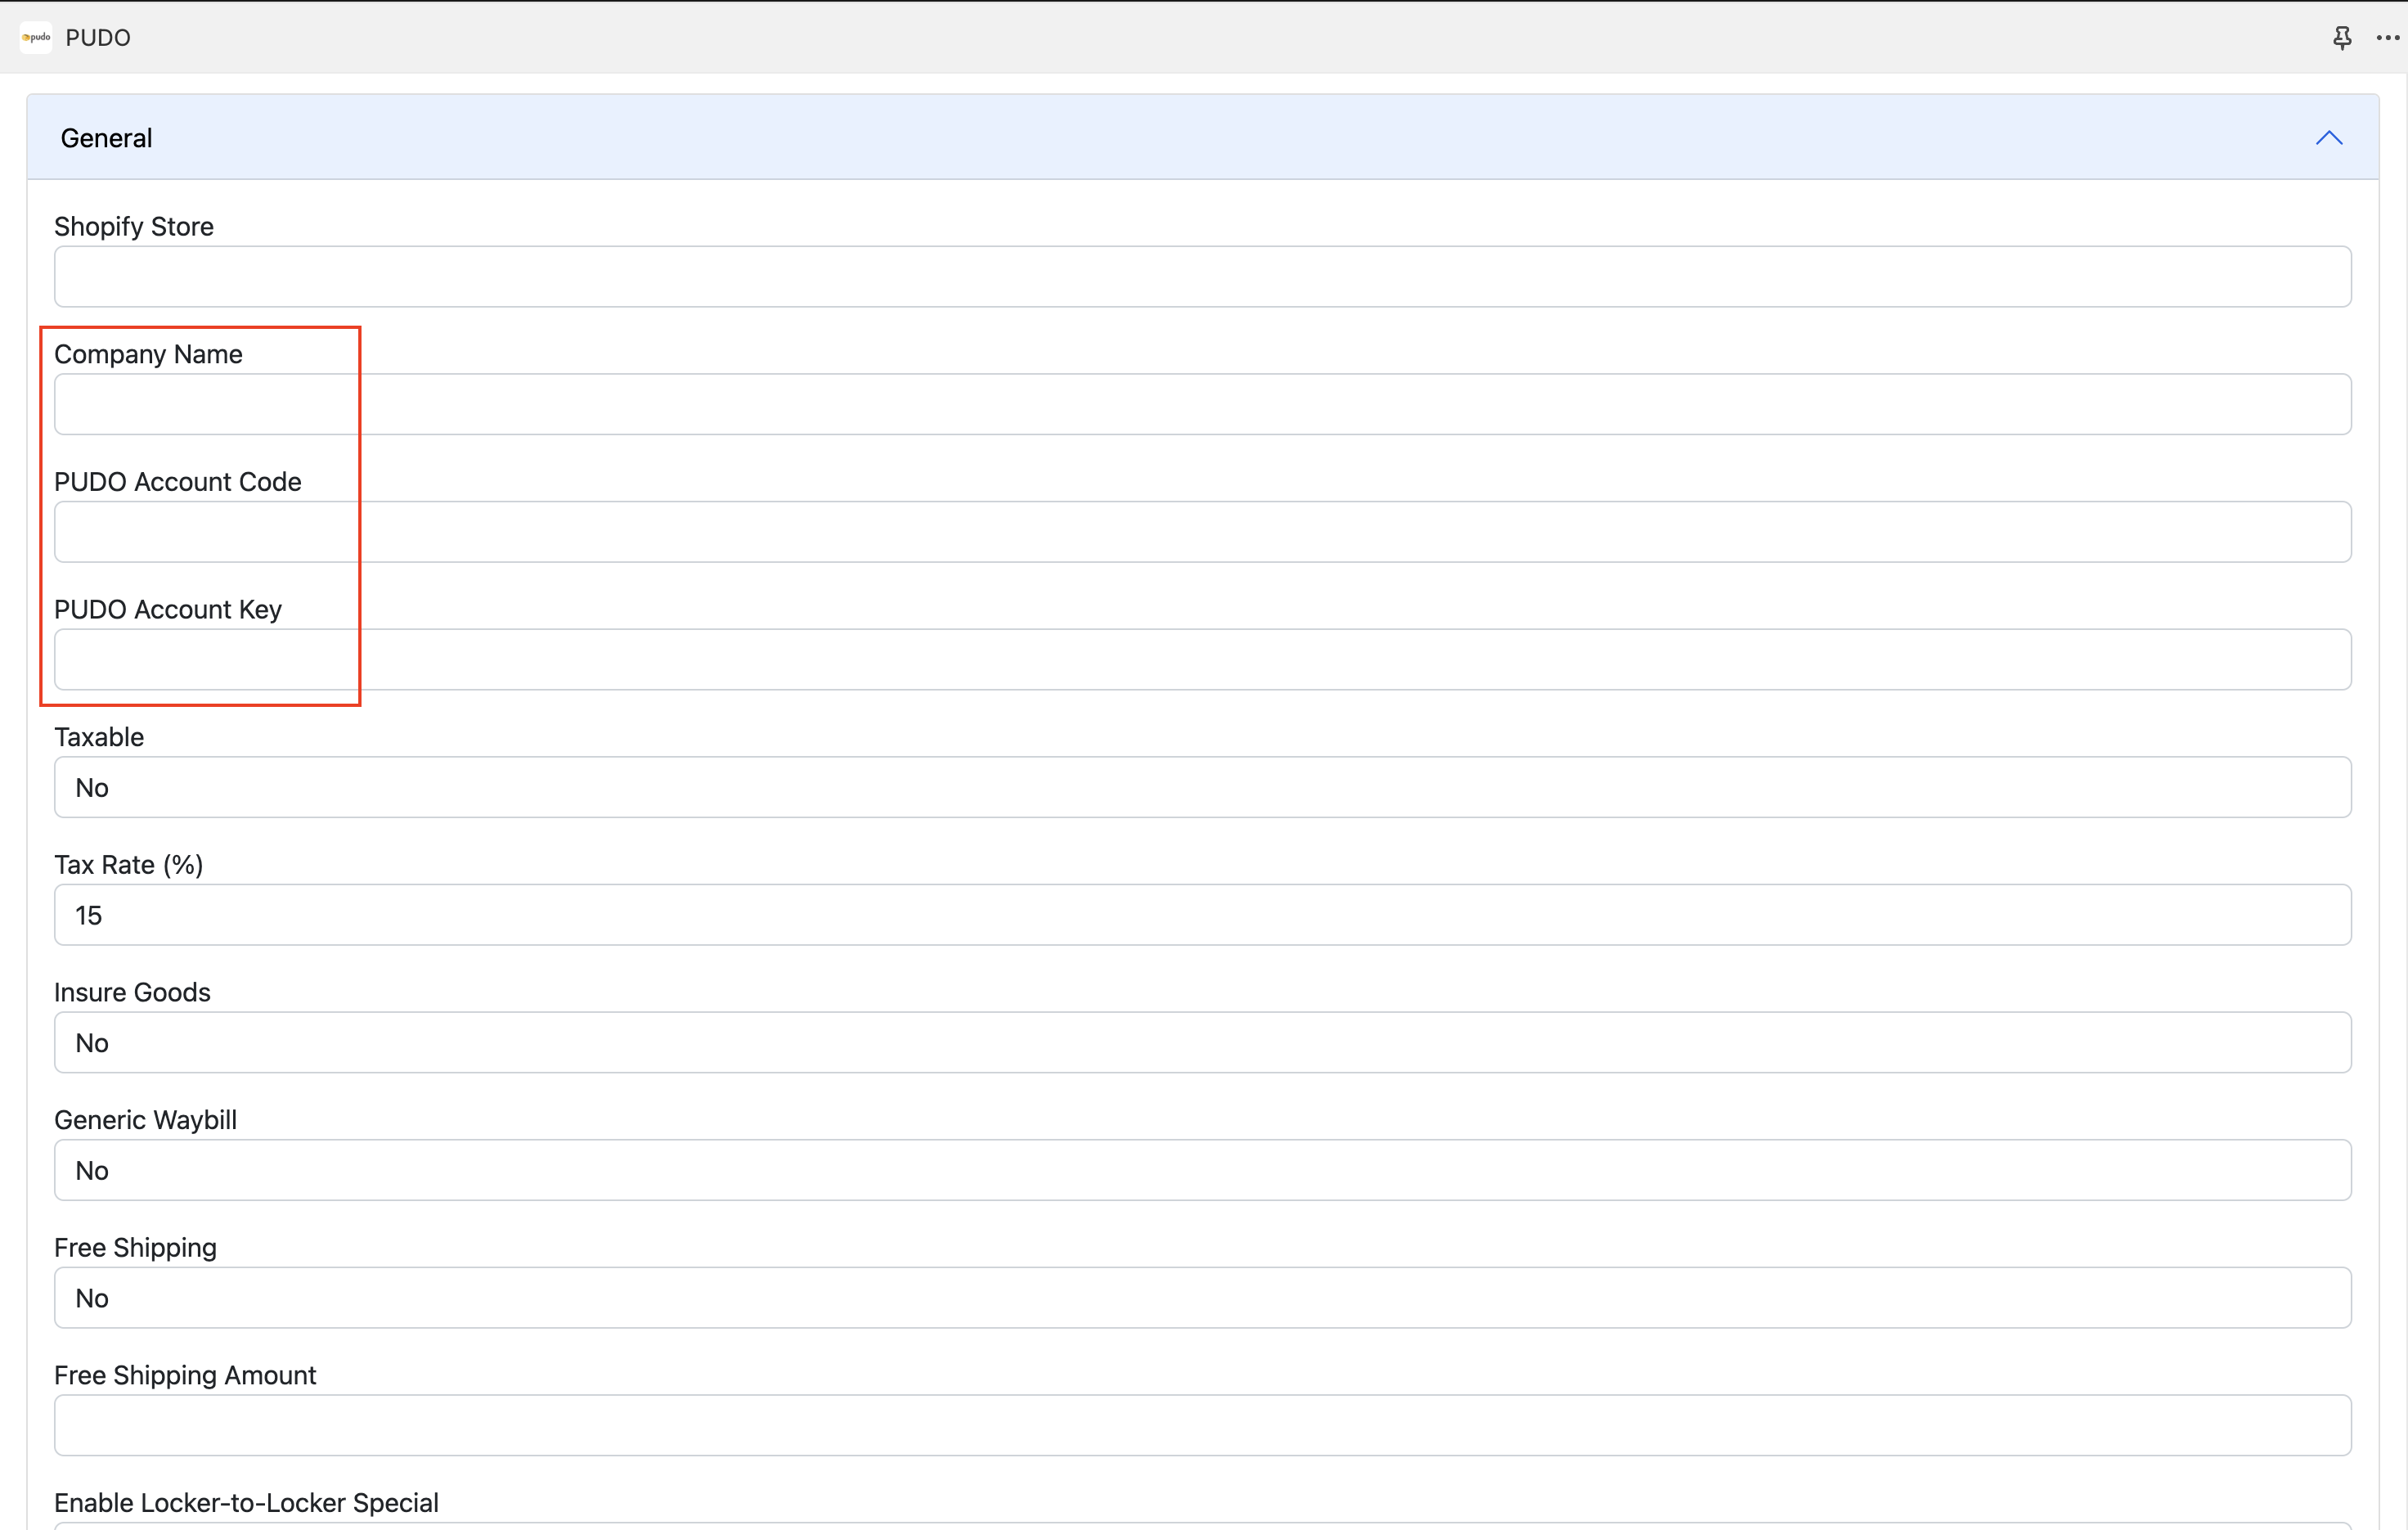
2. Configure General Settings
Under the "General" tab, fill in Company Name, Account Code, and Account Key. The other fields in the general tab are optional.
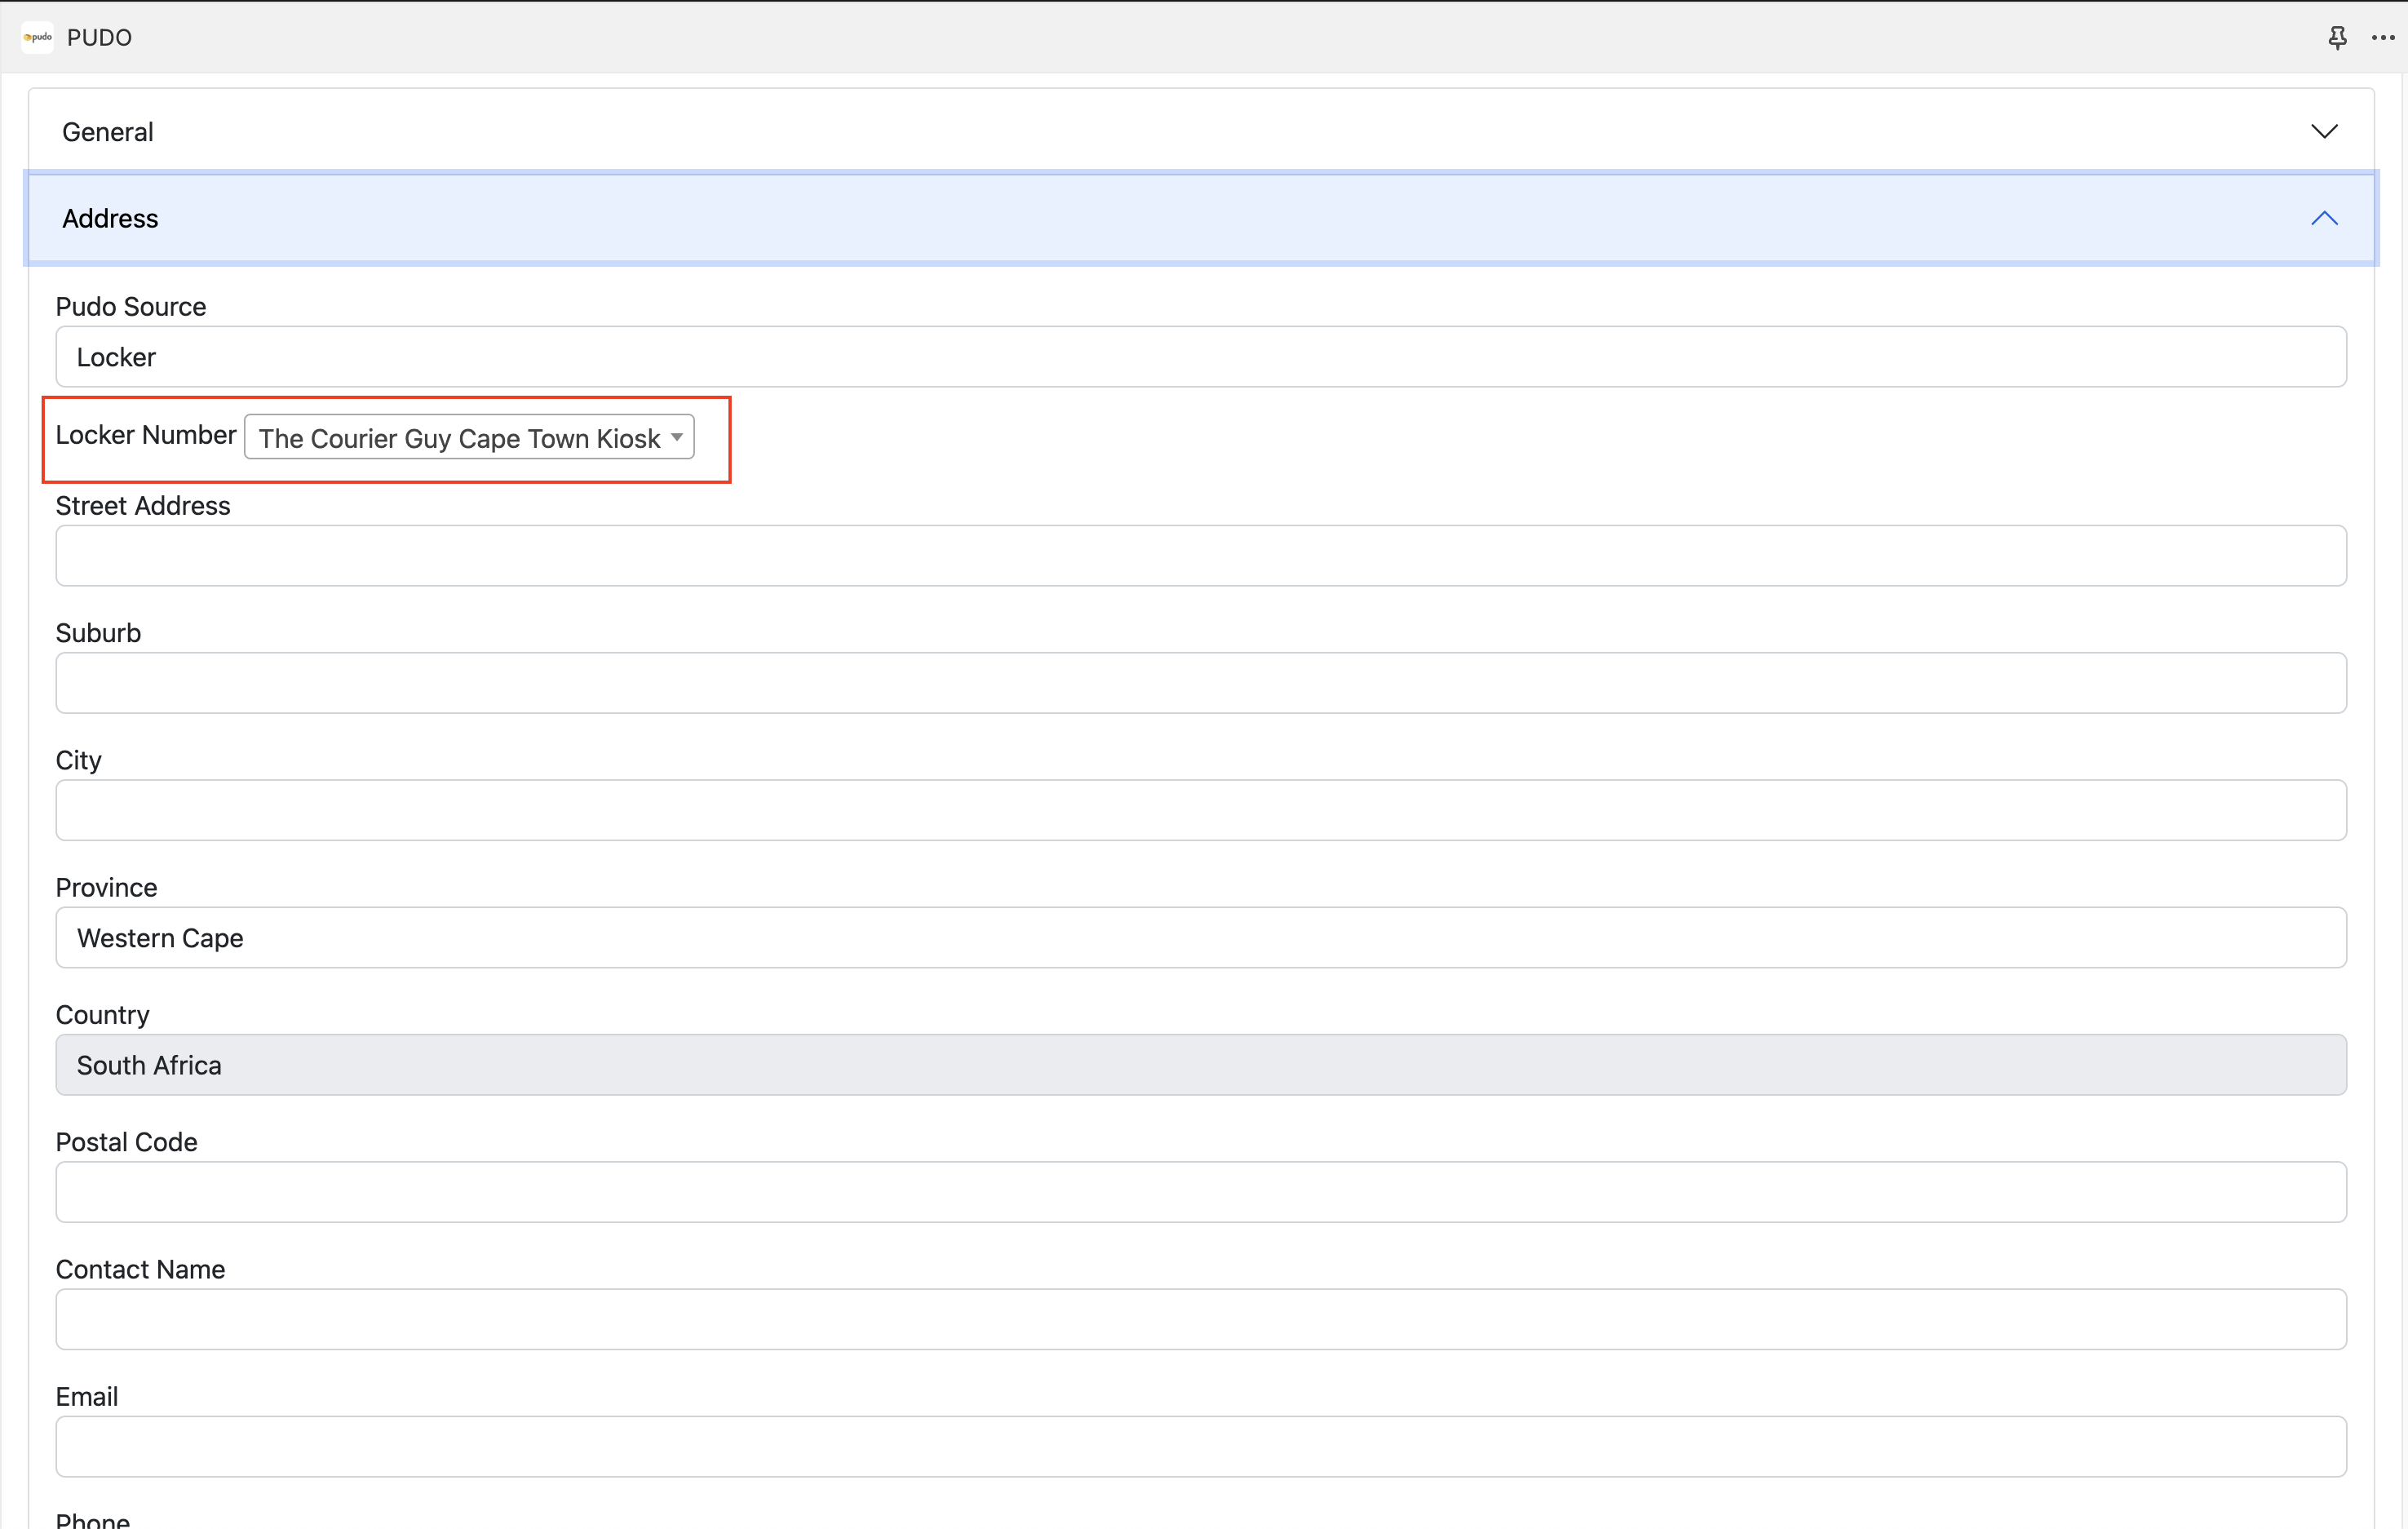
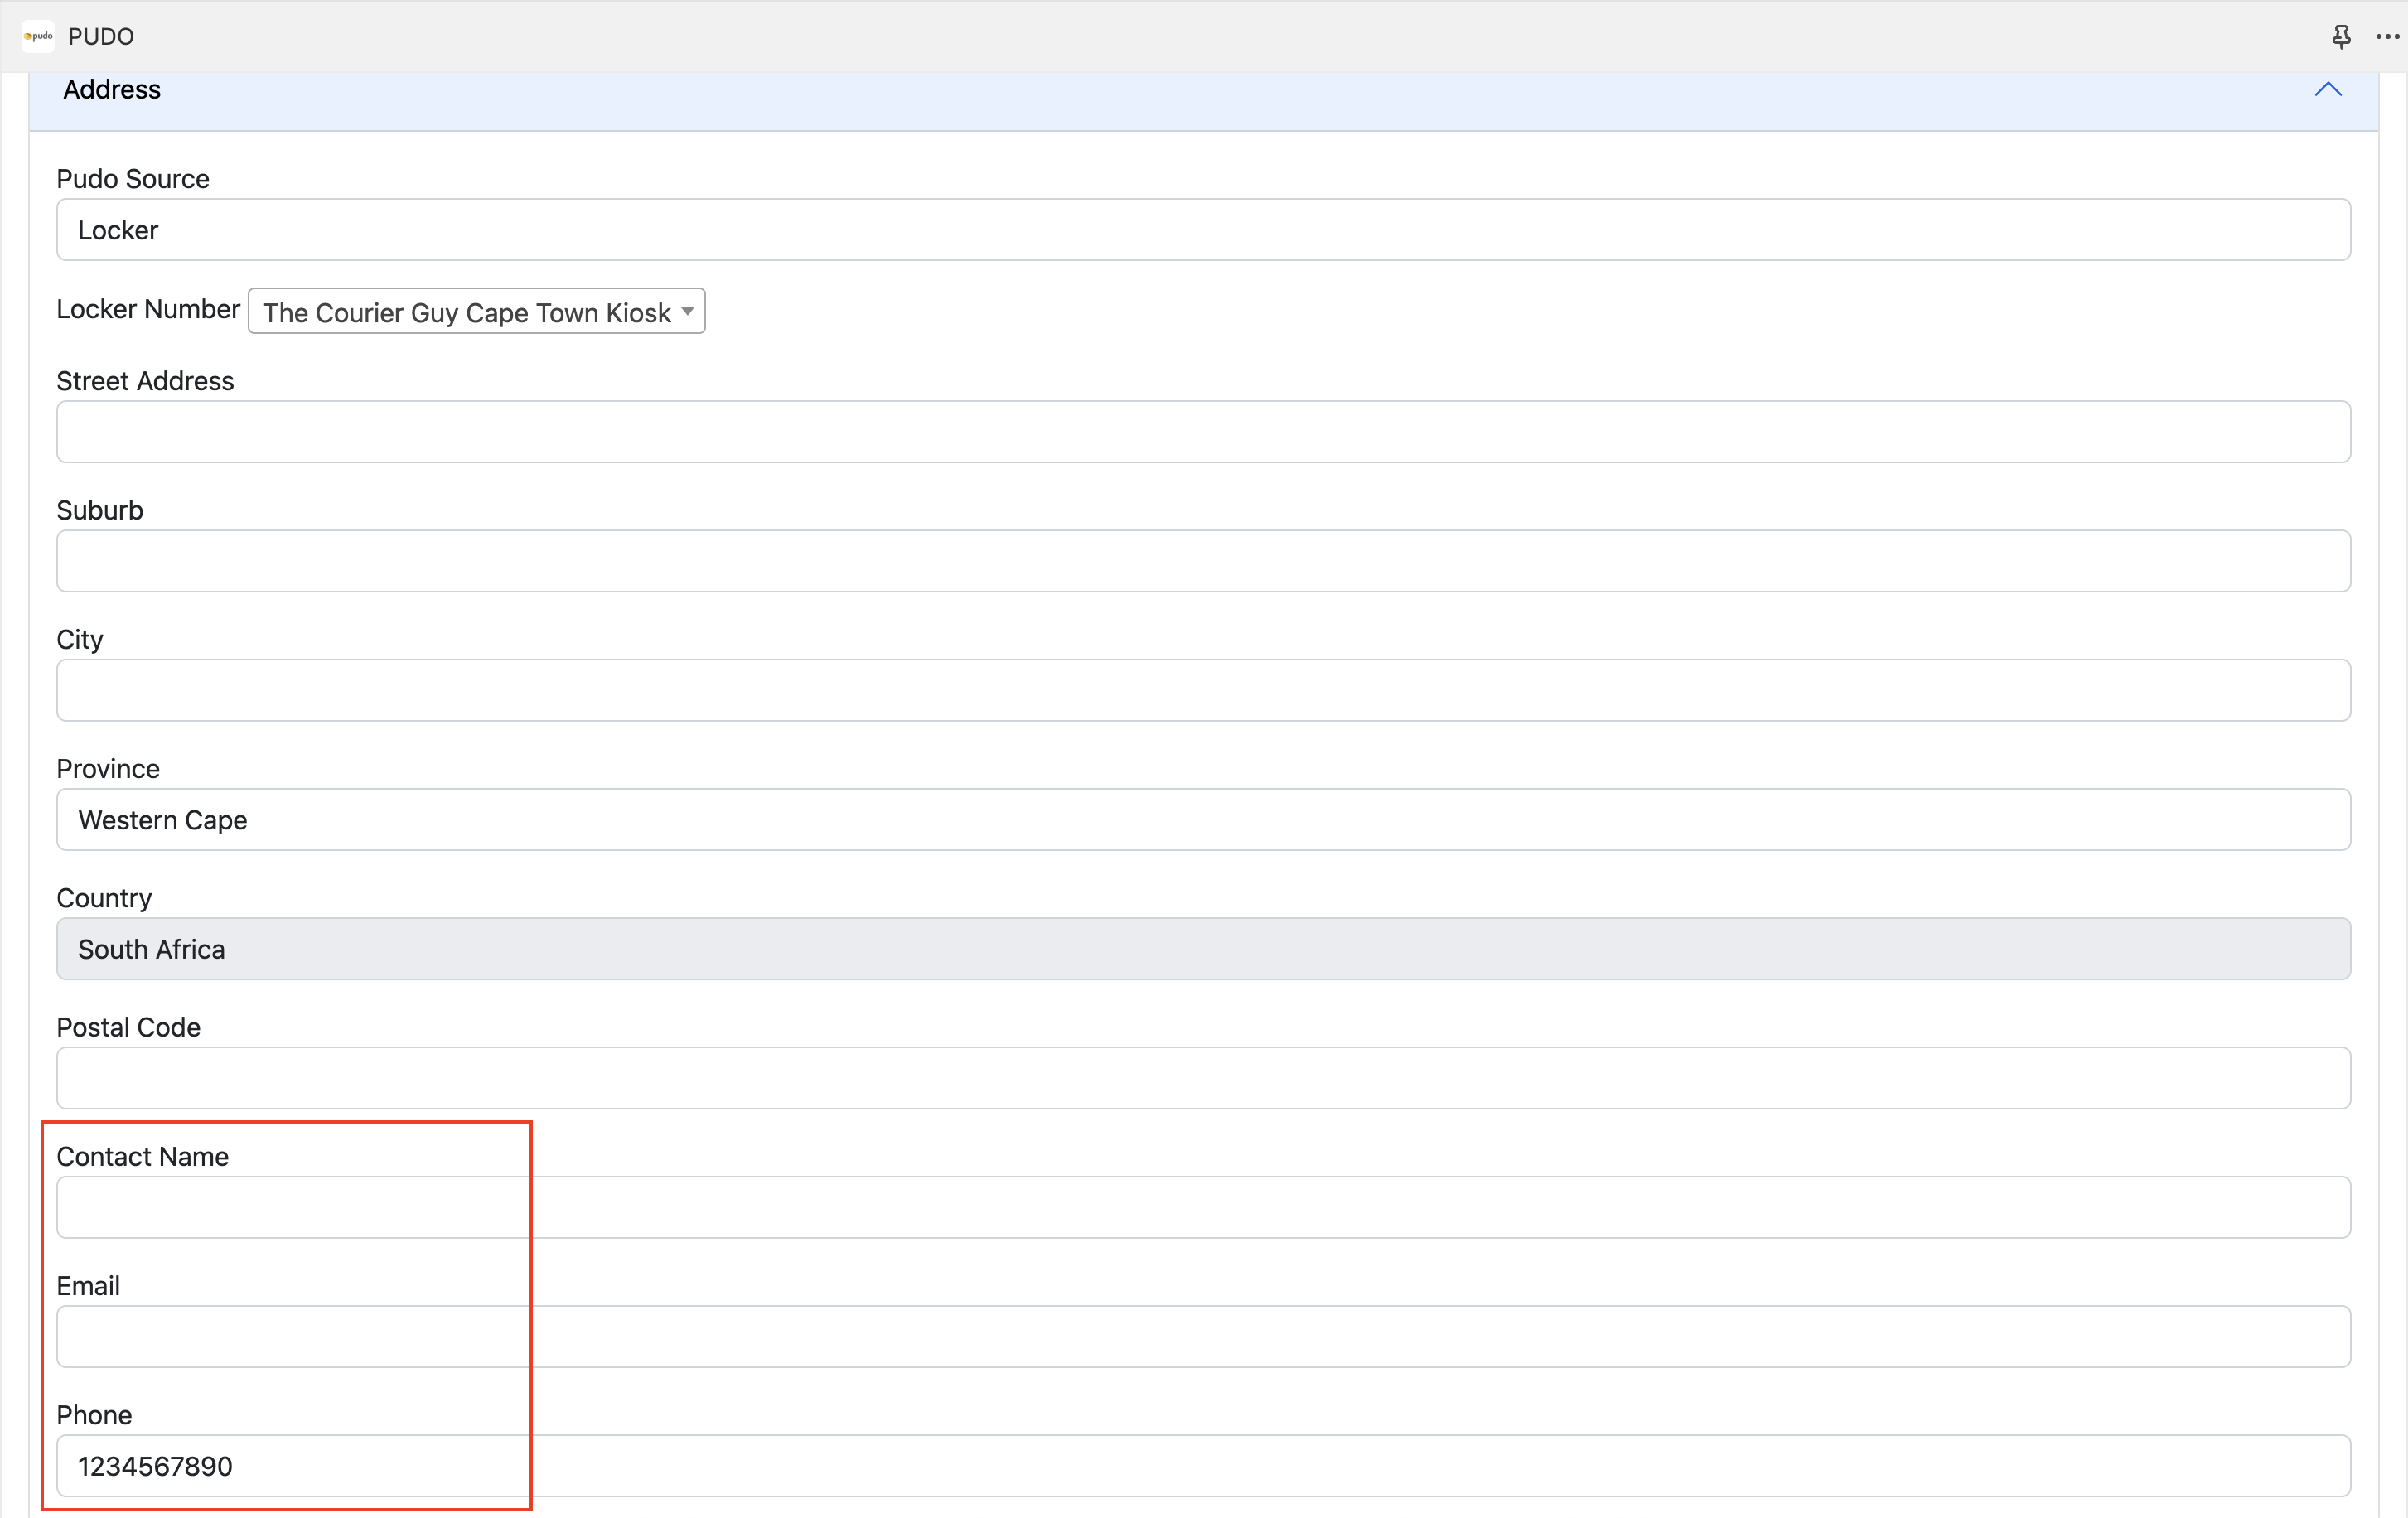
3. Configure Address Settings
Expand the "Address" tab and choose a preferred value for the “PUDO Source” dropdown (either Locker or Street Address).

4. Select PUDO Source Locker
In the “Locker Number” field, select your preferred PUDO source locker. This is required so clients can choose Locker -> Door or Locker -> Locker at checkout.
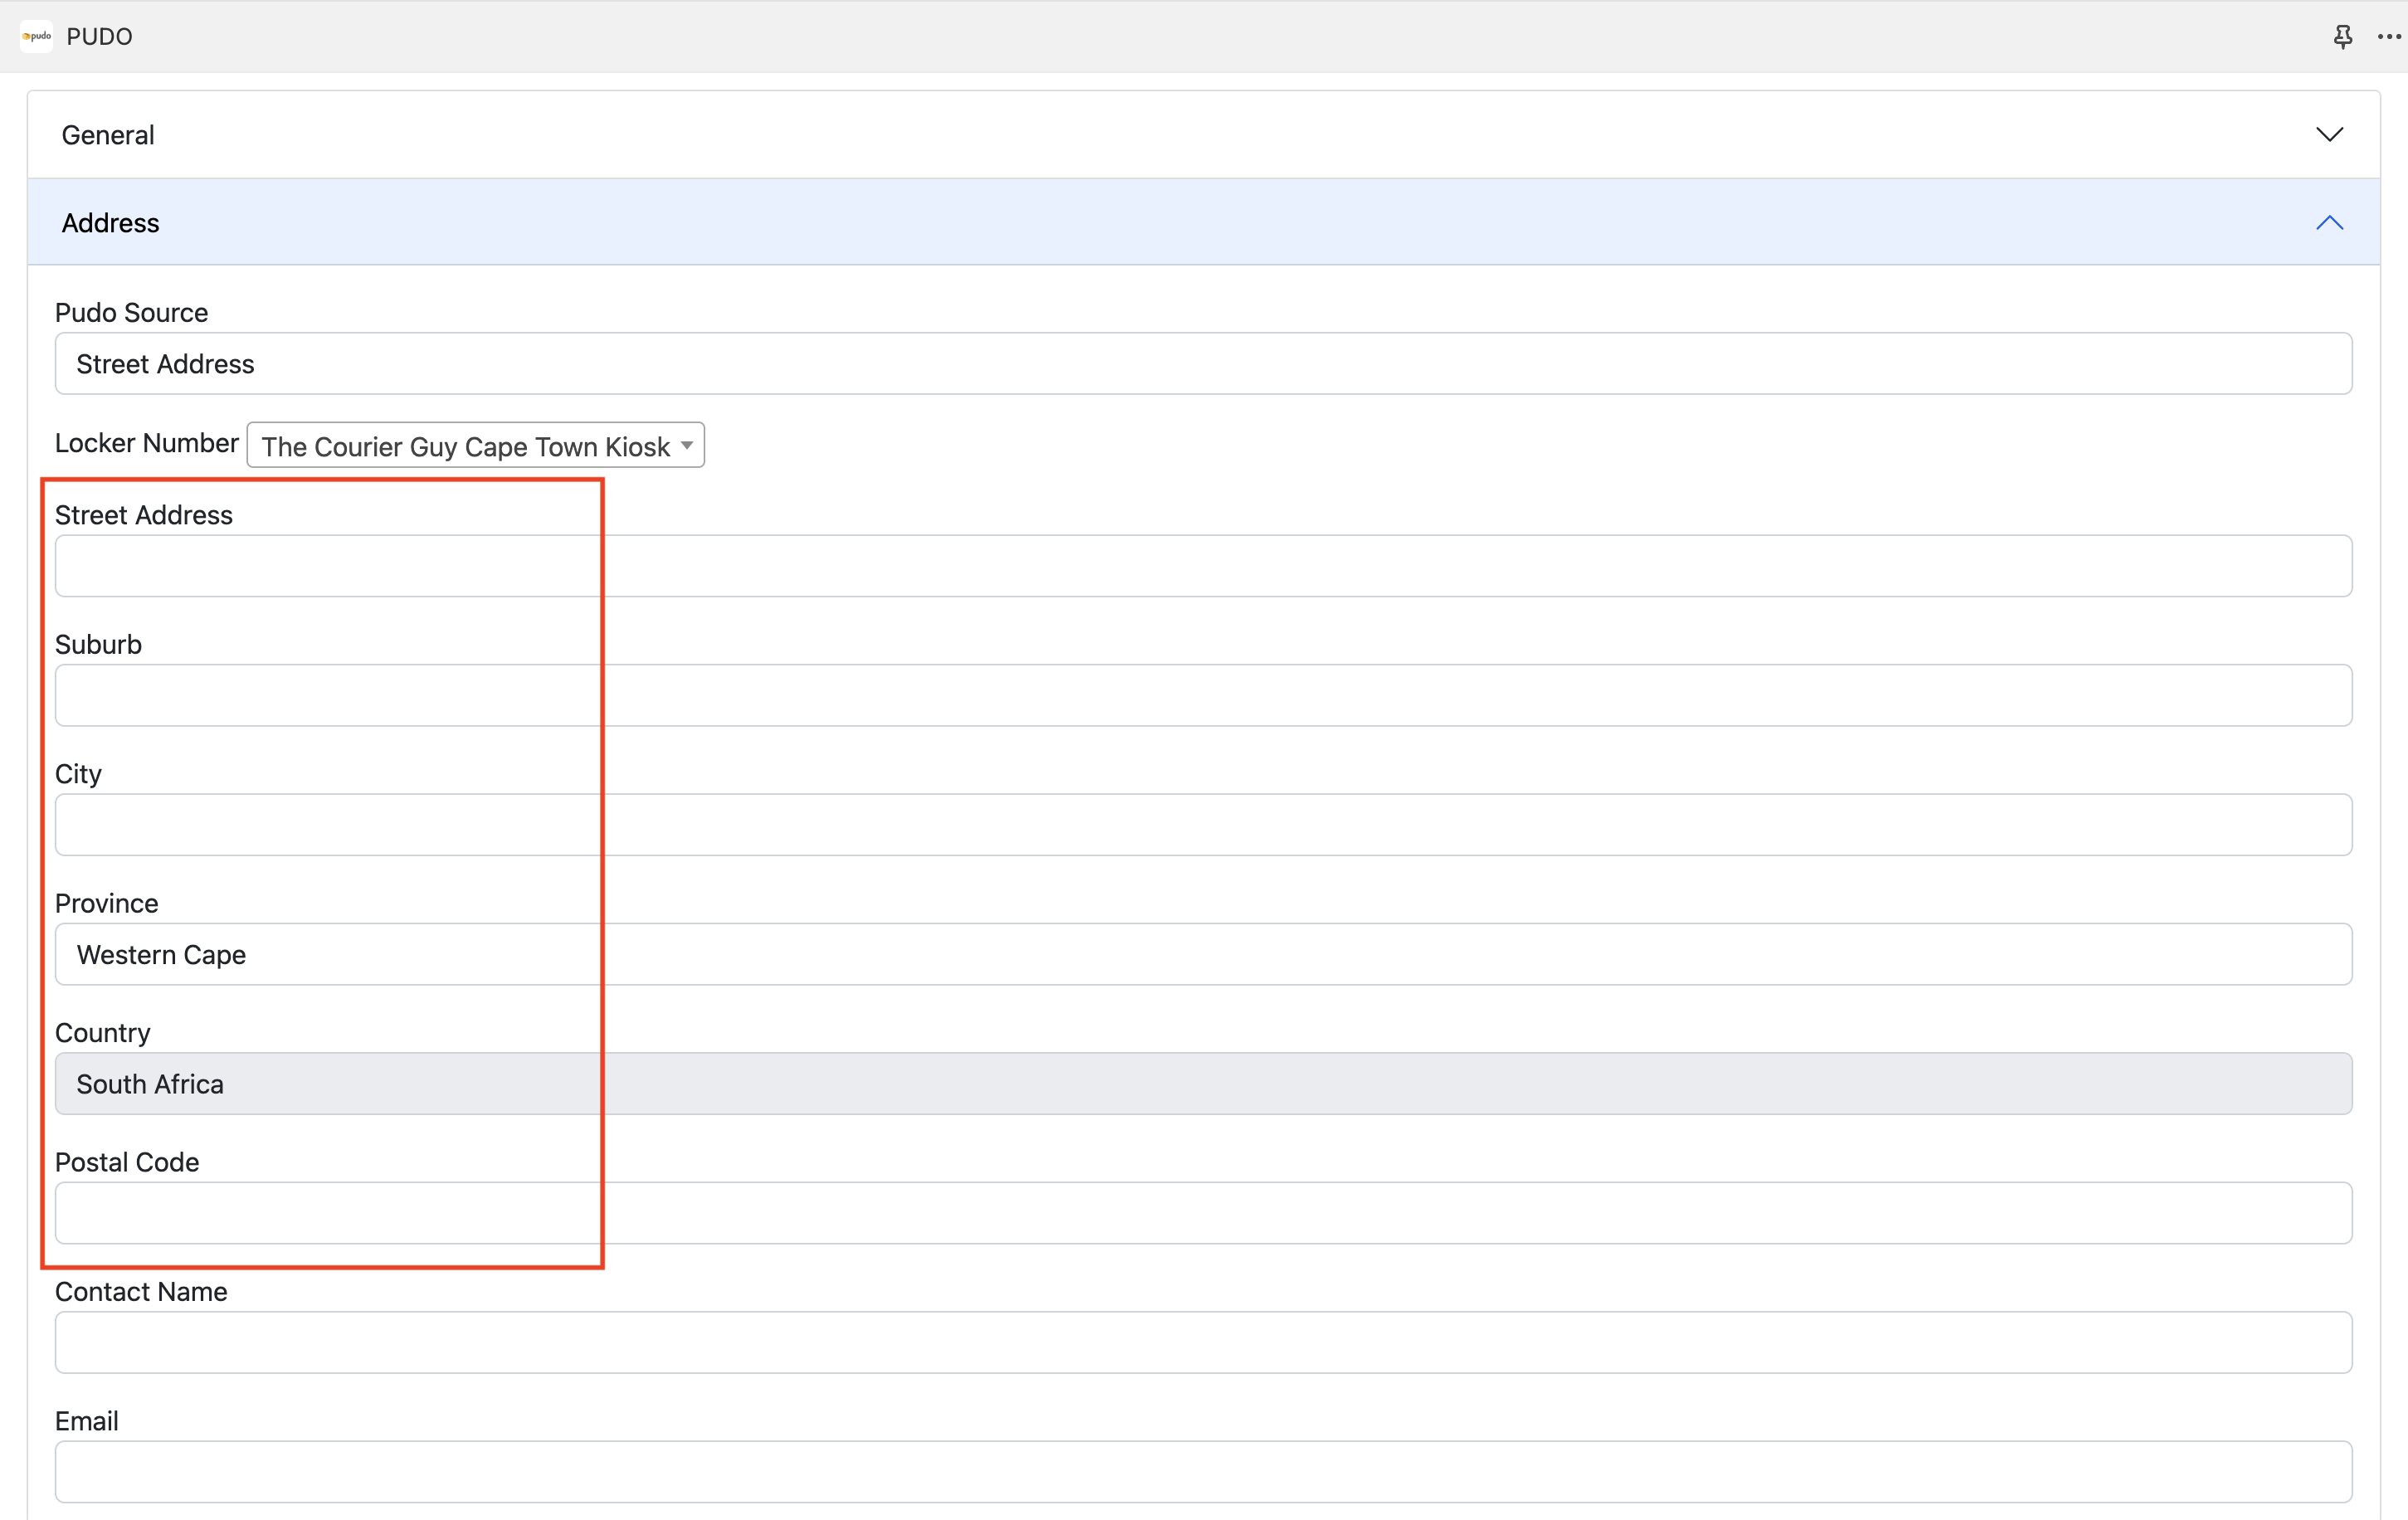
5. Enter Company Address
Fill in your Street Address, Suburb, City, Province, and Postal Code. The “Country” field is restricted to “South Africa.”
6. Enter Contact Details
Fill in your Contact Name, Email, and Phone.
7. Select Locker Size
Under the “Lockers” dropdown, choose the locker size that all orders will be restricted to (Extra Small, Small, Medium, Large, Extra Large). You can only have one locker size attached to your Shopify website.
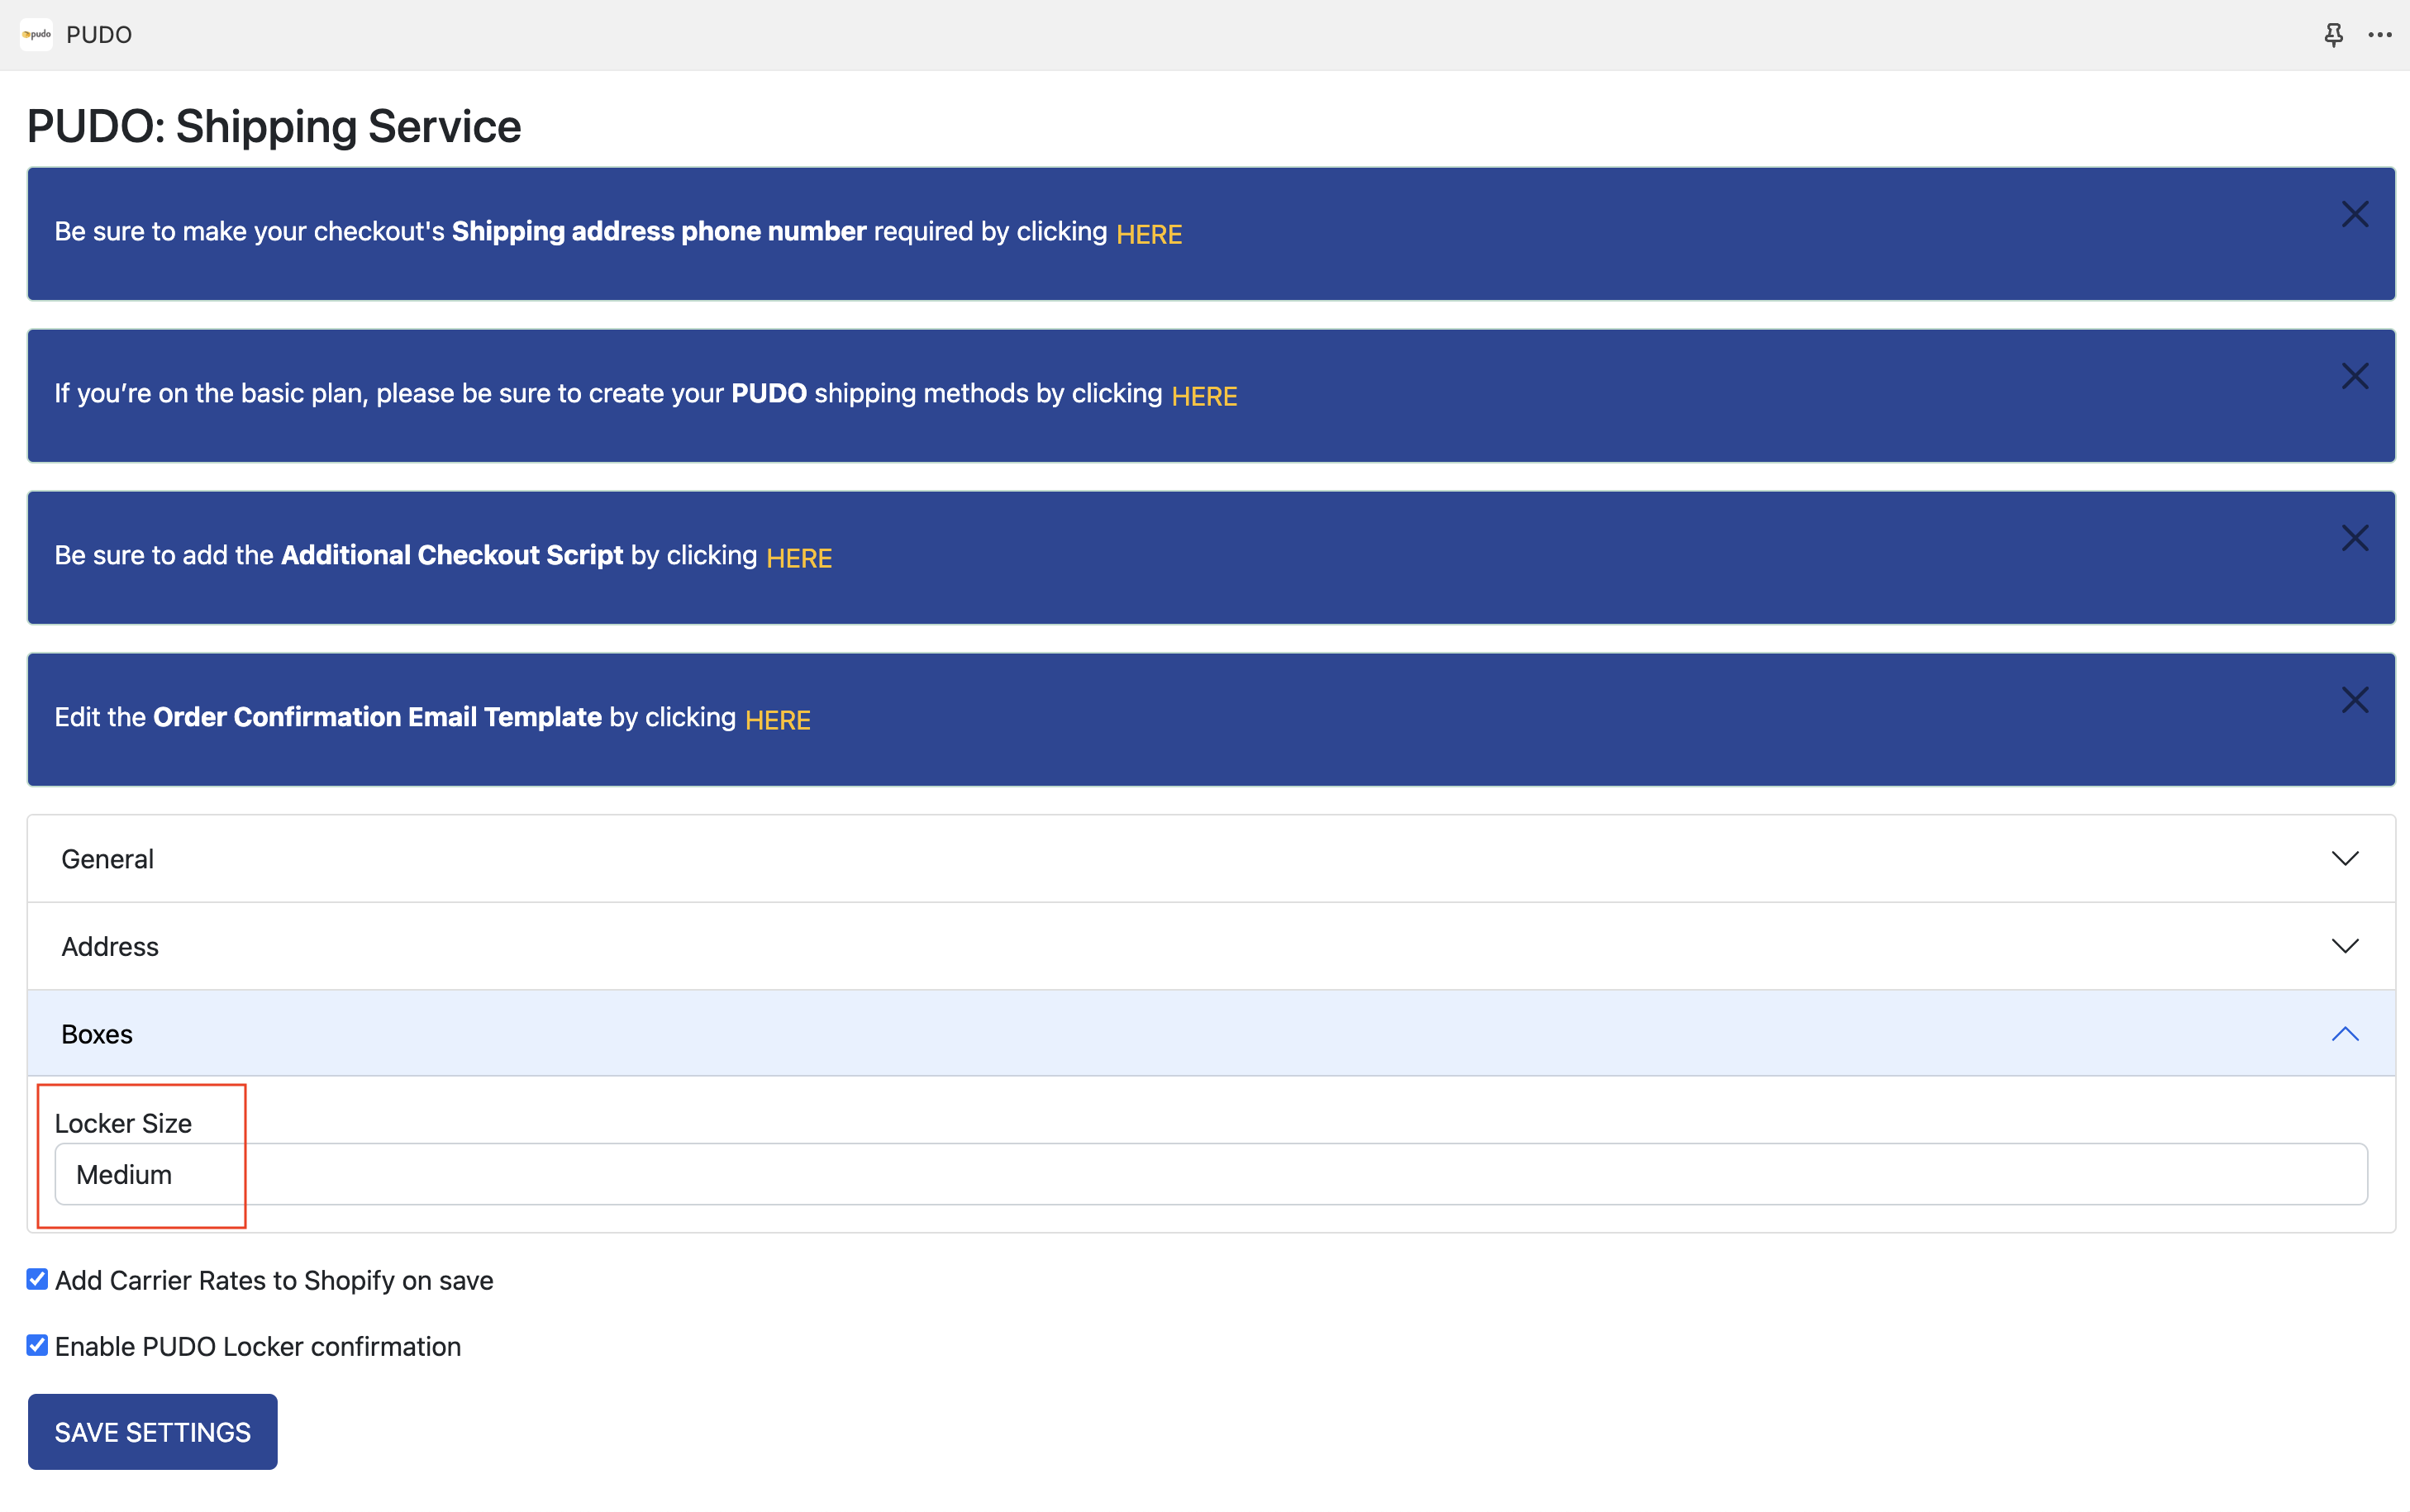
8. Optional Settings

8.1 Add Carrier Rates to Shopify on Save
Available only for Shopify Advanced Plans. It adds dynamic rates to your shipping.
8.2 Enable PUDO Locker Confirmation
This notifies the merchant on the submission page whether the customer has selected a locker. Once submitted, the customer's selection is pre-populated on the Submission page.

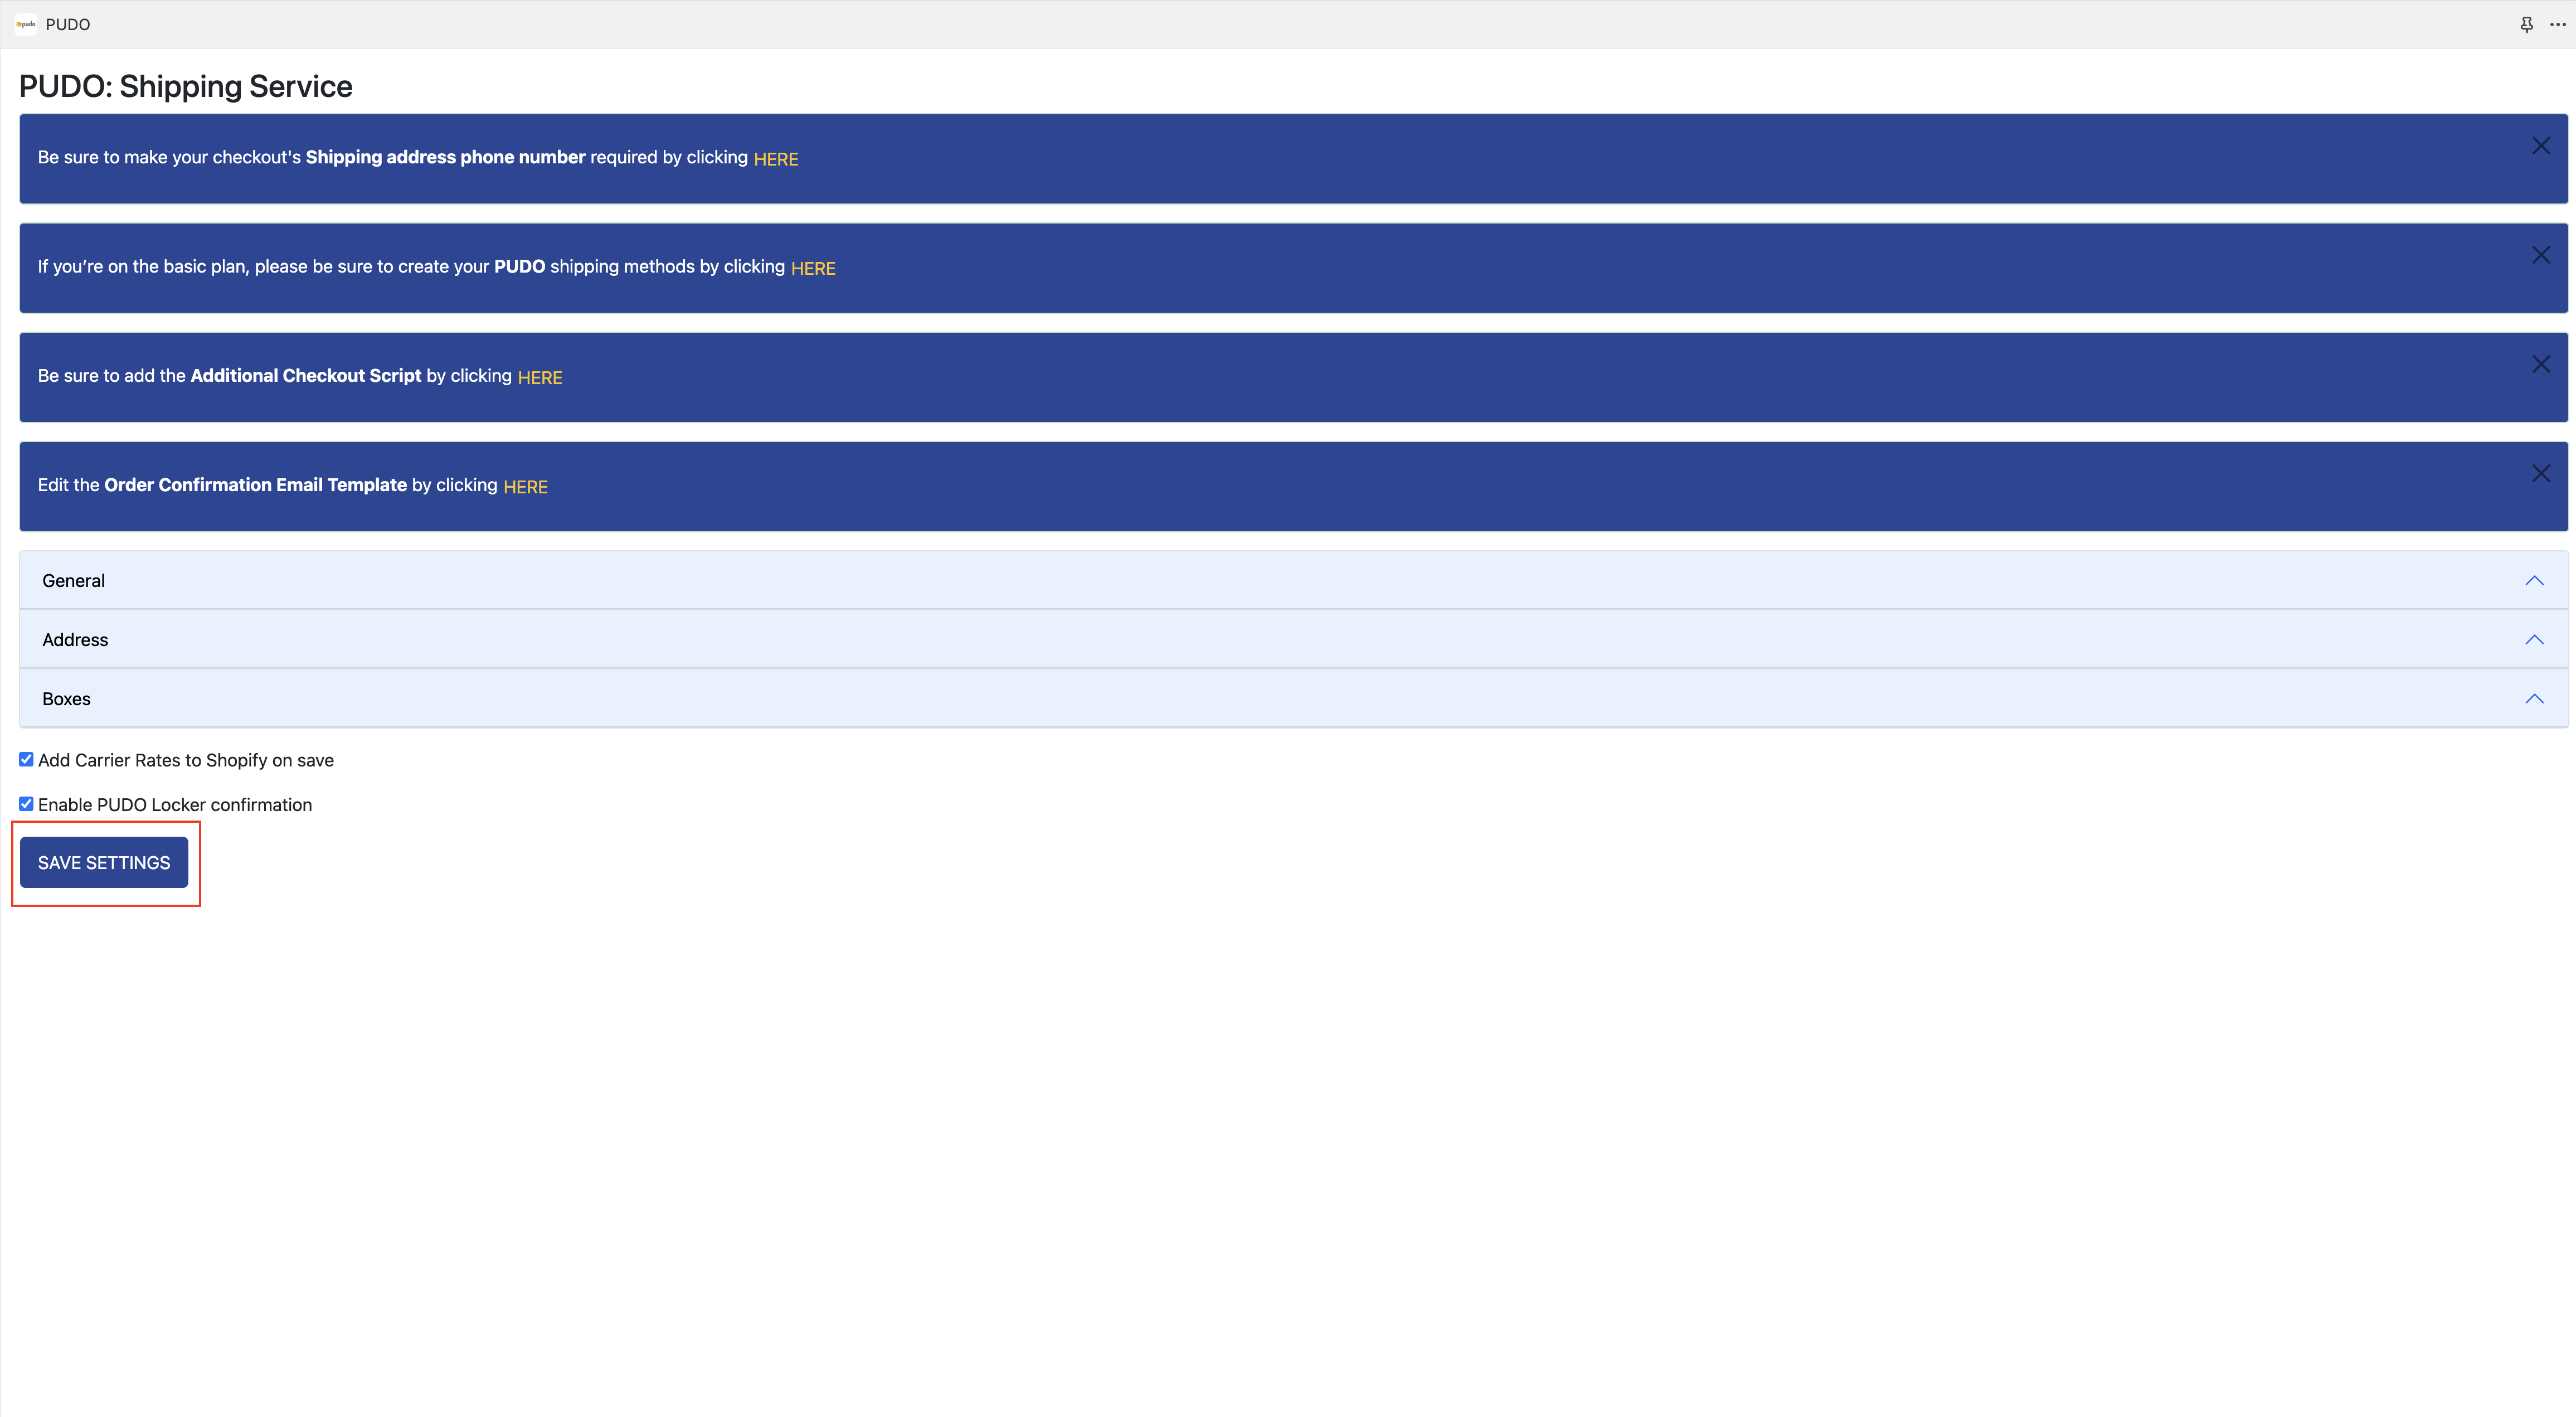
9. Save Settings
Click the Save Settings button to save your configuration.
10. Finishing Steps
These finishing steps help to ensure the plugin is configured correctly.
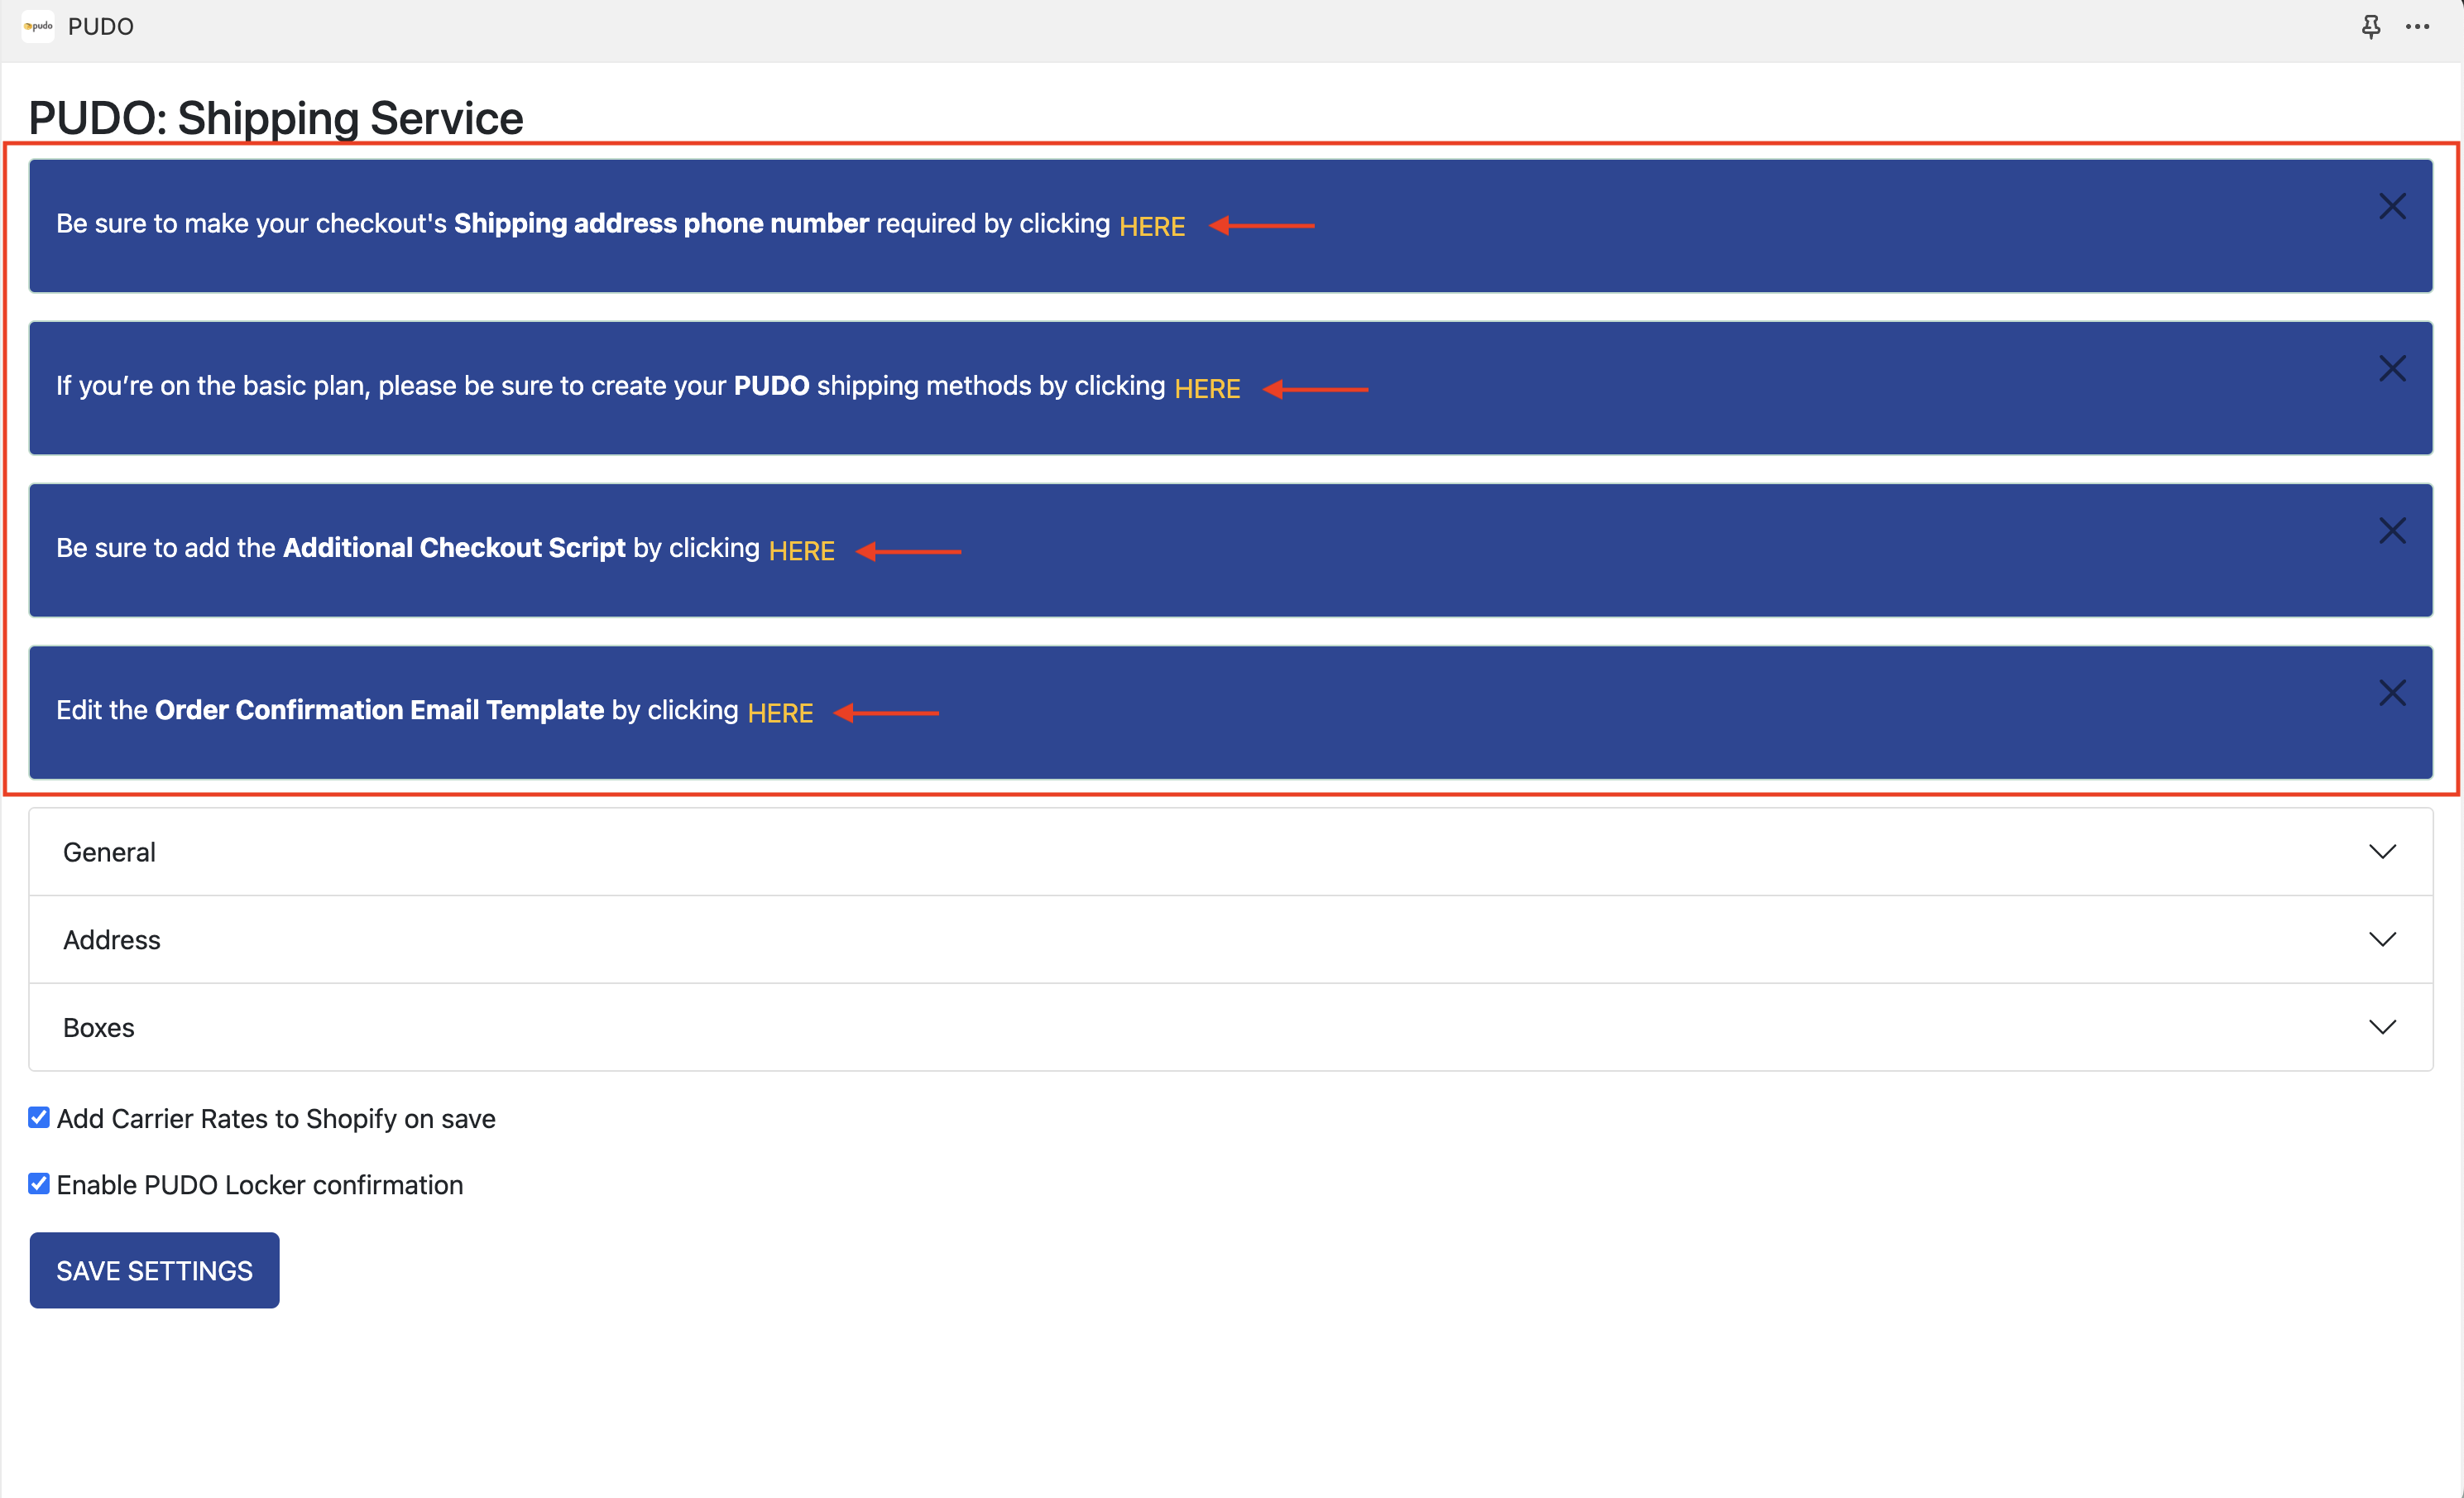
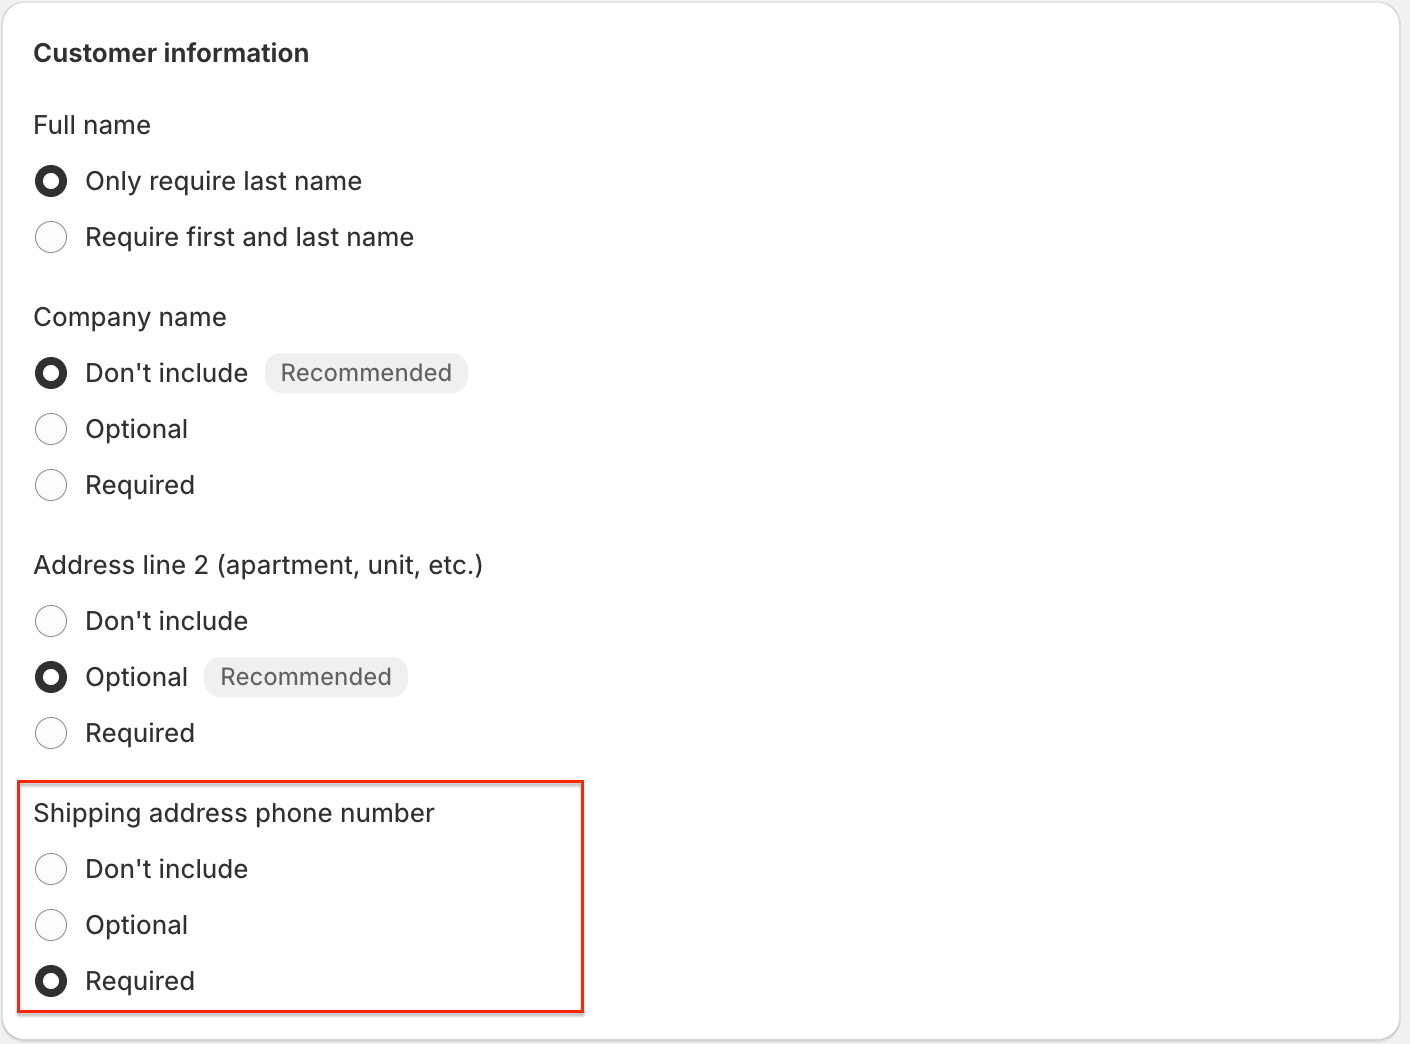
10.1 Shipping Address Phone Number
Click the notification for Shipping Address Phone Number to load a popup with Shopify checkout settings. Ensure that the phone number for shipping addresses is required.
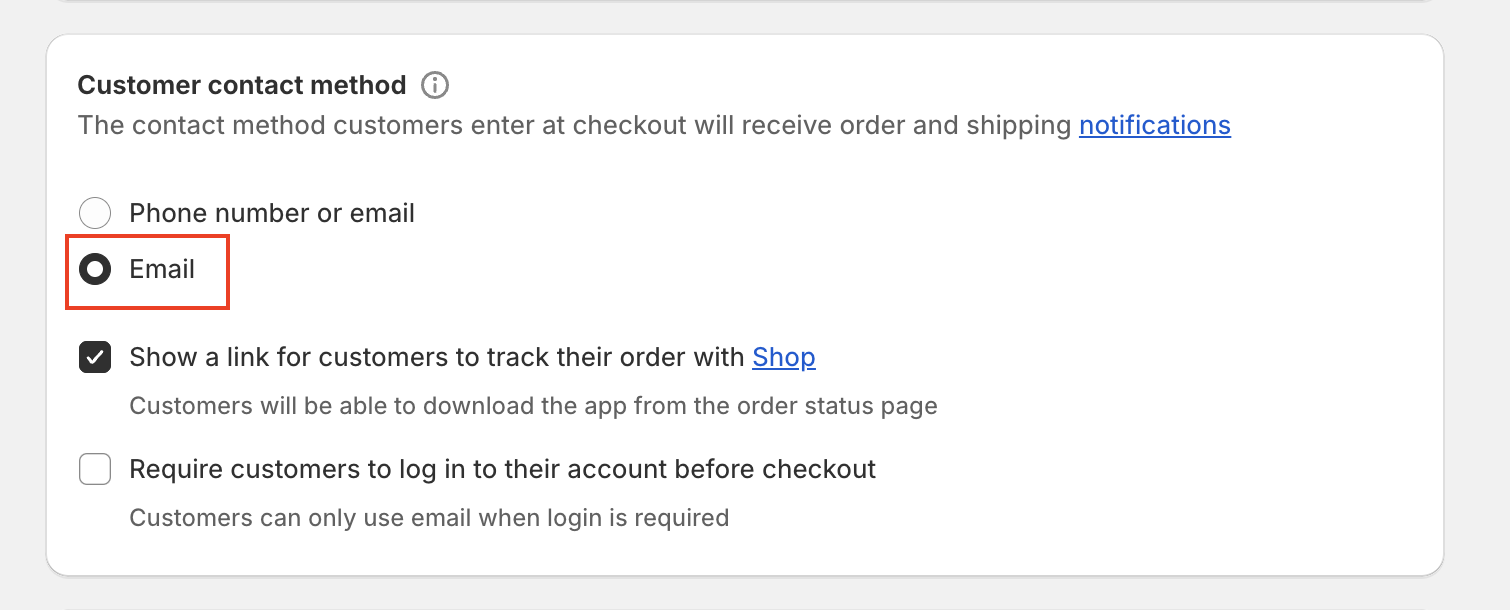
10.2 Shipping Address Email
Ensure that the Customer contact method is set to 'Email'.
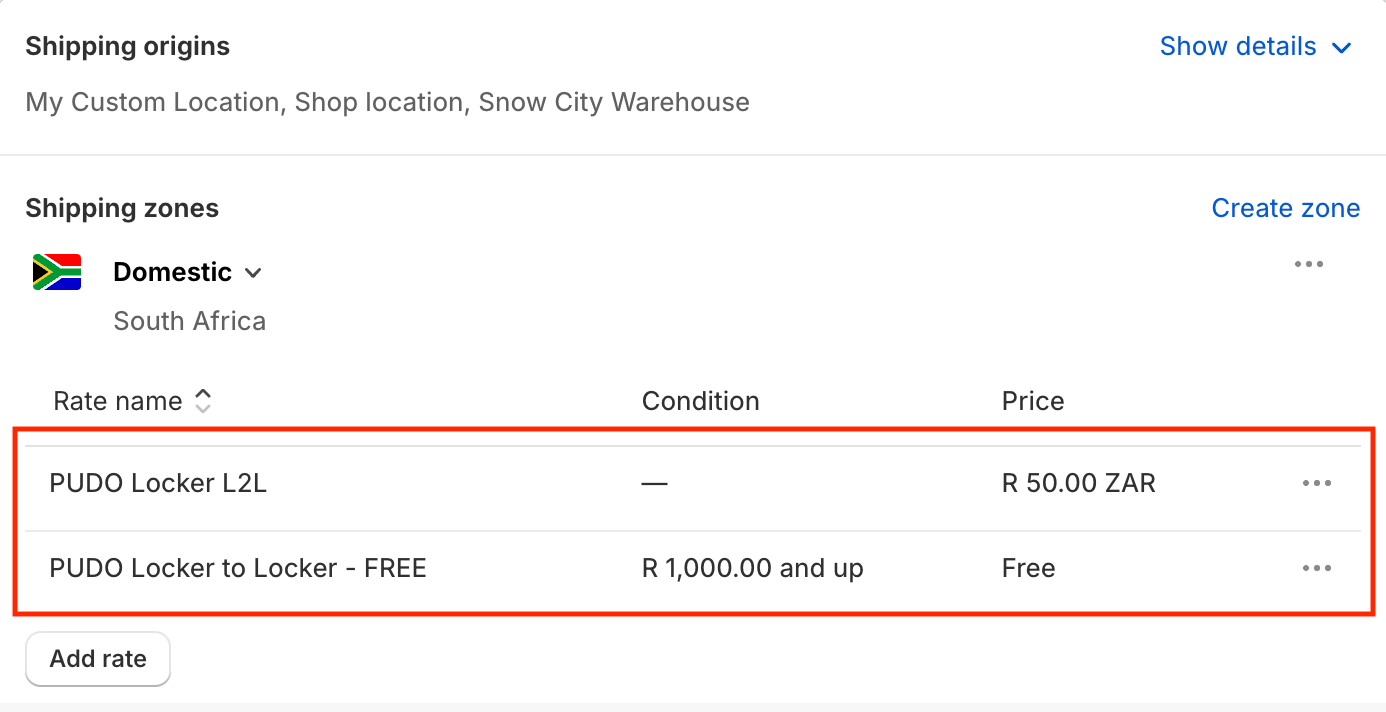
10.3 Flat-Rate Shipping Methods
If you are on a Basic Plan or don't wish to use Carrier Rates, create 2 flat-rate shipping methods for your South African shipping zone, ensuring they include “PUDO Locker” in their names (e.g., PUDO Locker D2D or PUDO Locker to Door).
10.4 Locker Confirmation Checkout Script
If Enable PUDO Locker Confirmation is checked, go to Settings -> Checkout and add the following code to the Order status page additional scripts field:
<script>
function getShippingMethodFromOrderDetails() {
  return Shopify.checkout.shipping_rate.handle;
}
let selectedShippingMethod = getShippingMethodFromOrderDetails();

if (selectedShippingMethod.includes('PUDO') && selectedShippingMethod.includes('Locker')) {
  const URL = "https://shp.pudo.co.za/otp_confirmation?shop=" + Shopify.shop + "&orderID=" + Shopify.checkout.order_id;
  Shopify.Checkout.OrderStatus.addContentBox('<h2>PUDO Locker Destination</h2>', '<p>Please select your locker destination in the link below: <a href="' + URL + '">Click here</a></p>');
}
</script>

10.5 Order Confirmation Email Template
If Enable PUDO Locker Confirmation is checked, select the Order Confirmation Email template -> edit code and paste the code from below the shipping info table (+-line 854 in the unedited template). Save your changes.
{% if shipping_method and shipping_method.handle contains 'PUDO' and shipping_method.handle contains 'Locker' %}
{% assign shopName = shop.domain %}
{% assign orderID = order.id %}
{% capture URL %}
  https://shp.pudo.co.za/otp_confirmation?shop={{ shopName }}&orderID={{ orderID }}
{% endcapture %}
<p>Please select your locker destination in the link below: <a href="{{ URL }}">Click here</a></p>
{% endif %}
Testing the Configuration
1. Prime Checkout
Navigate to the front end of your Shopify store, add a product to your cart and navigate to the Checkout page.
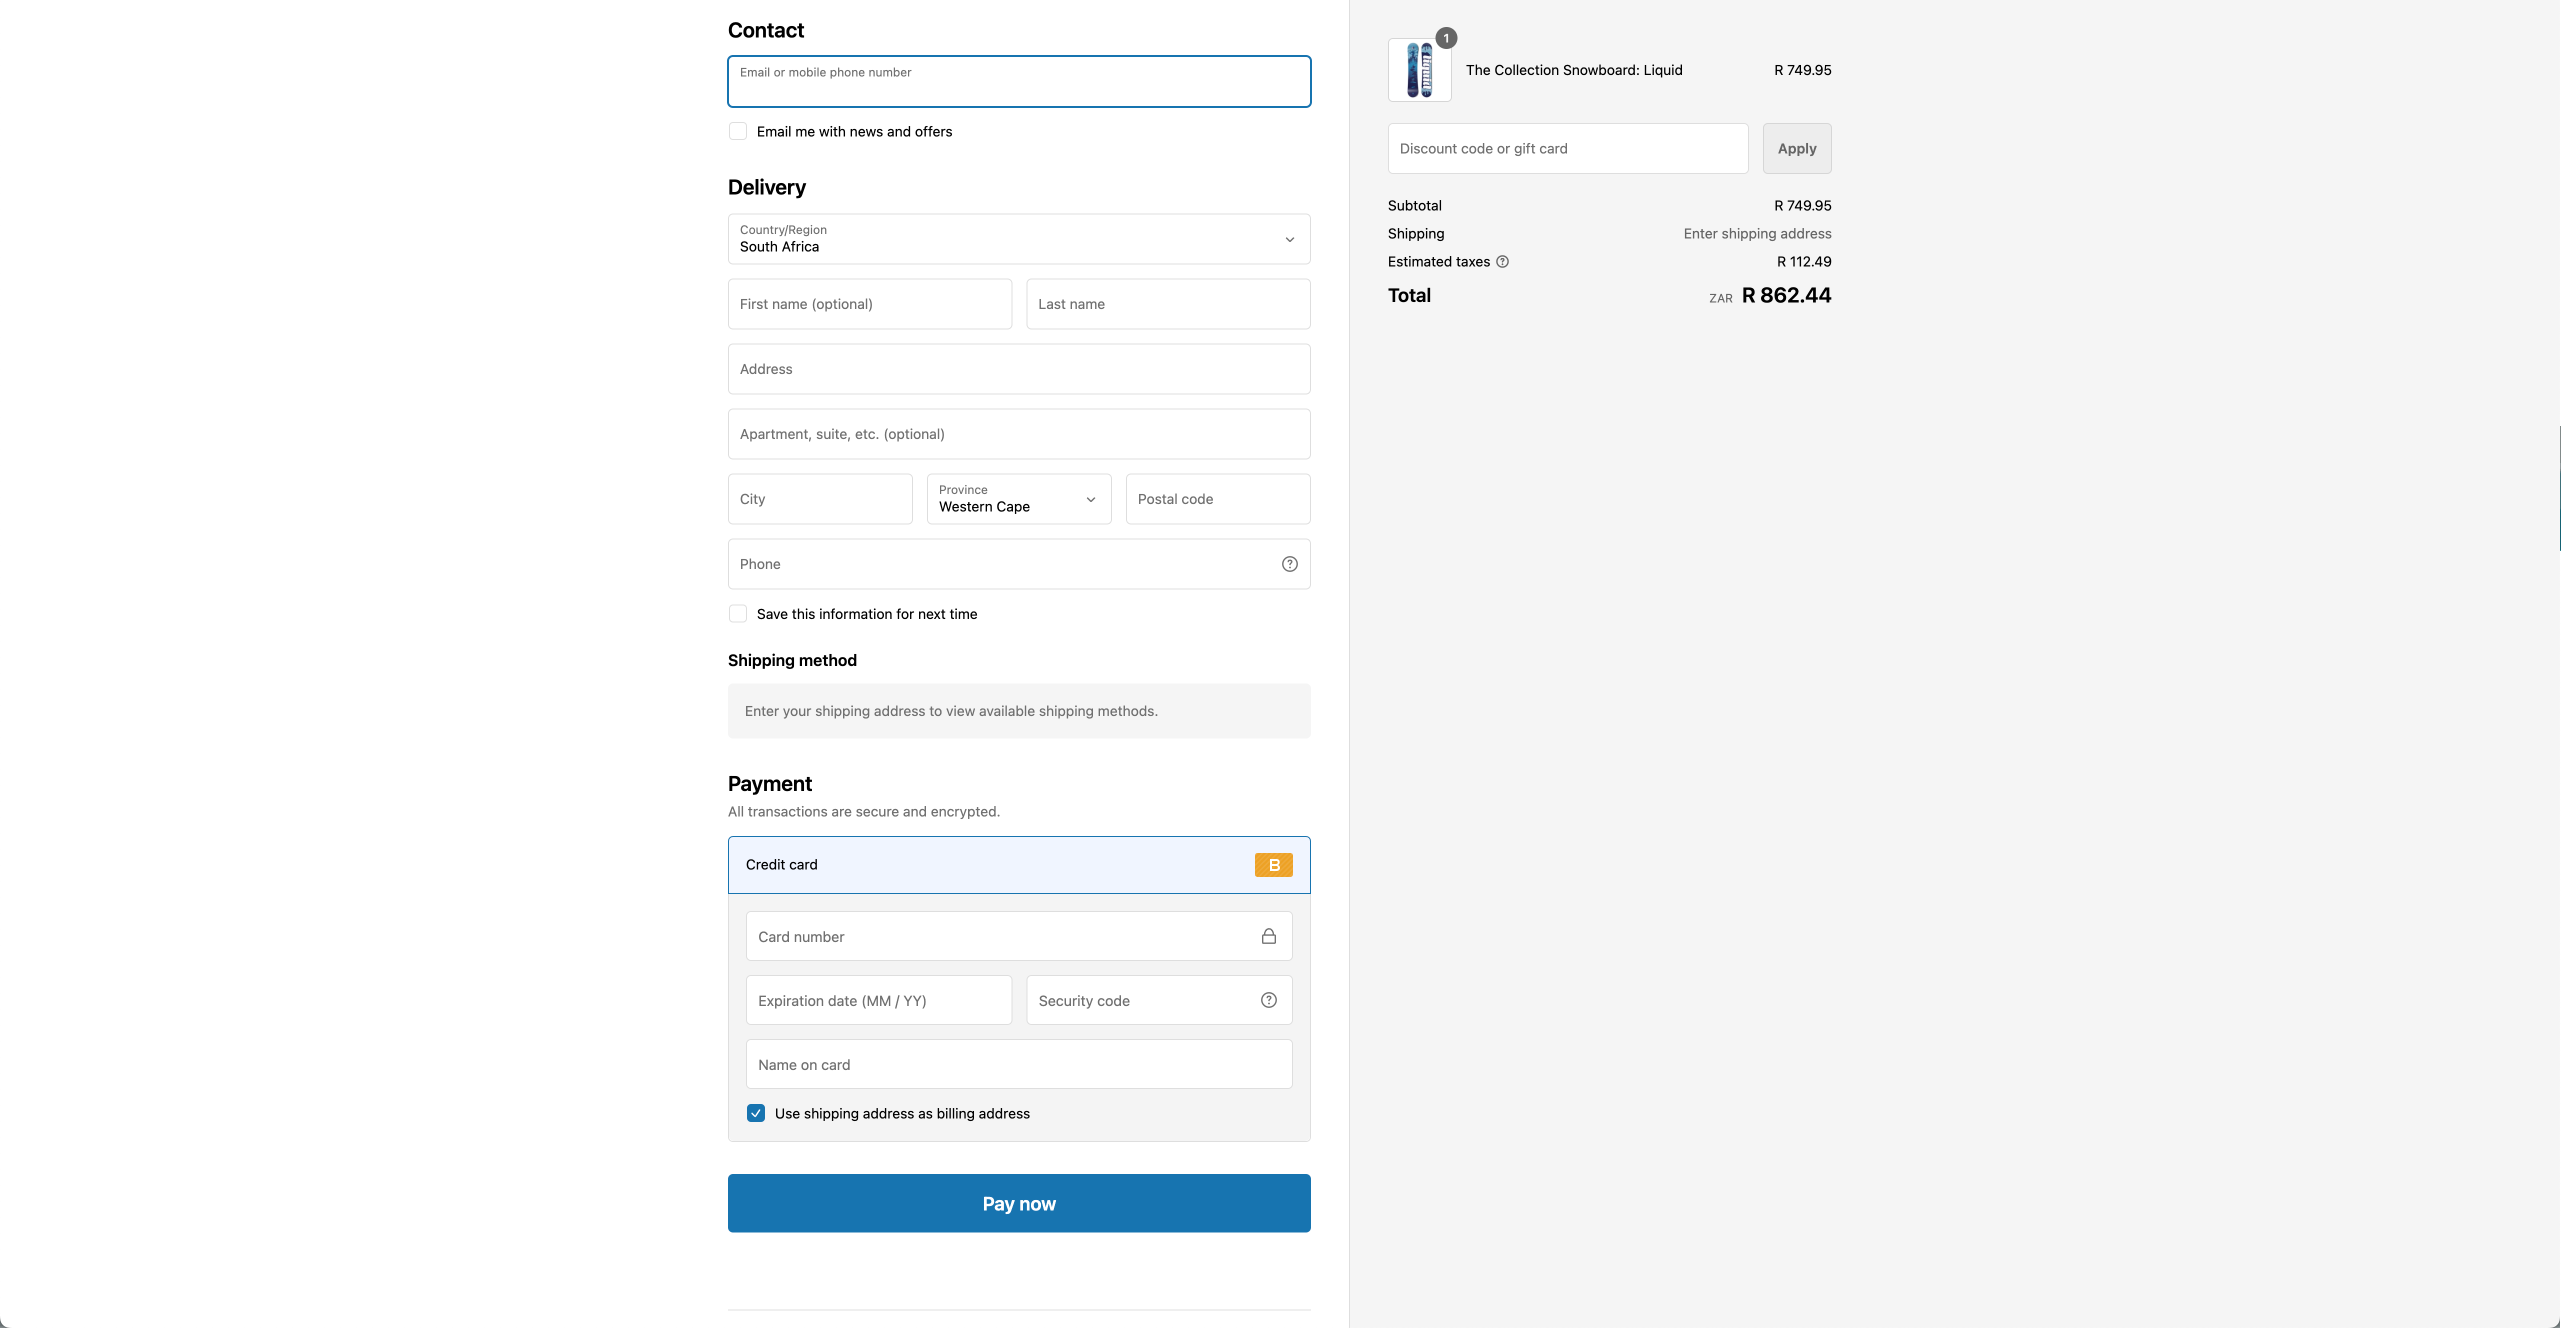
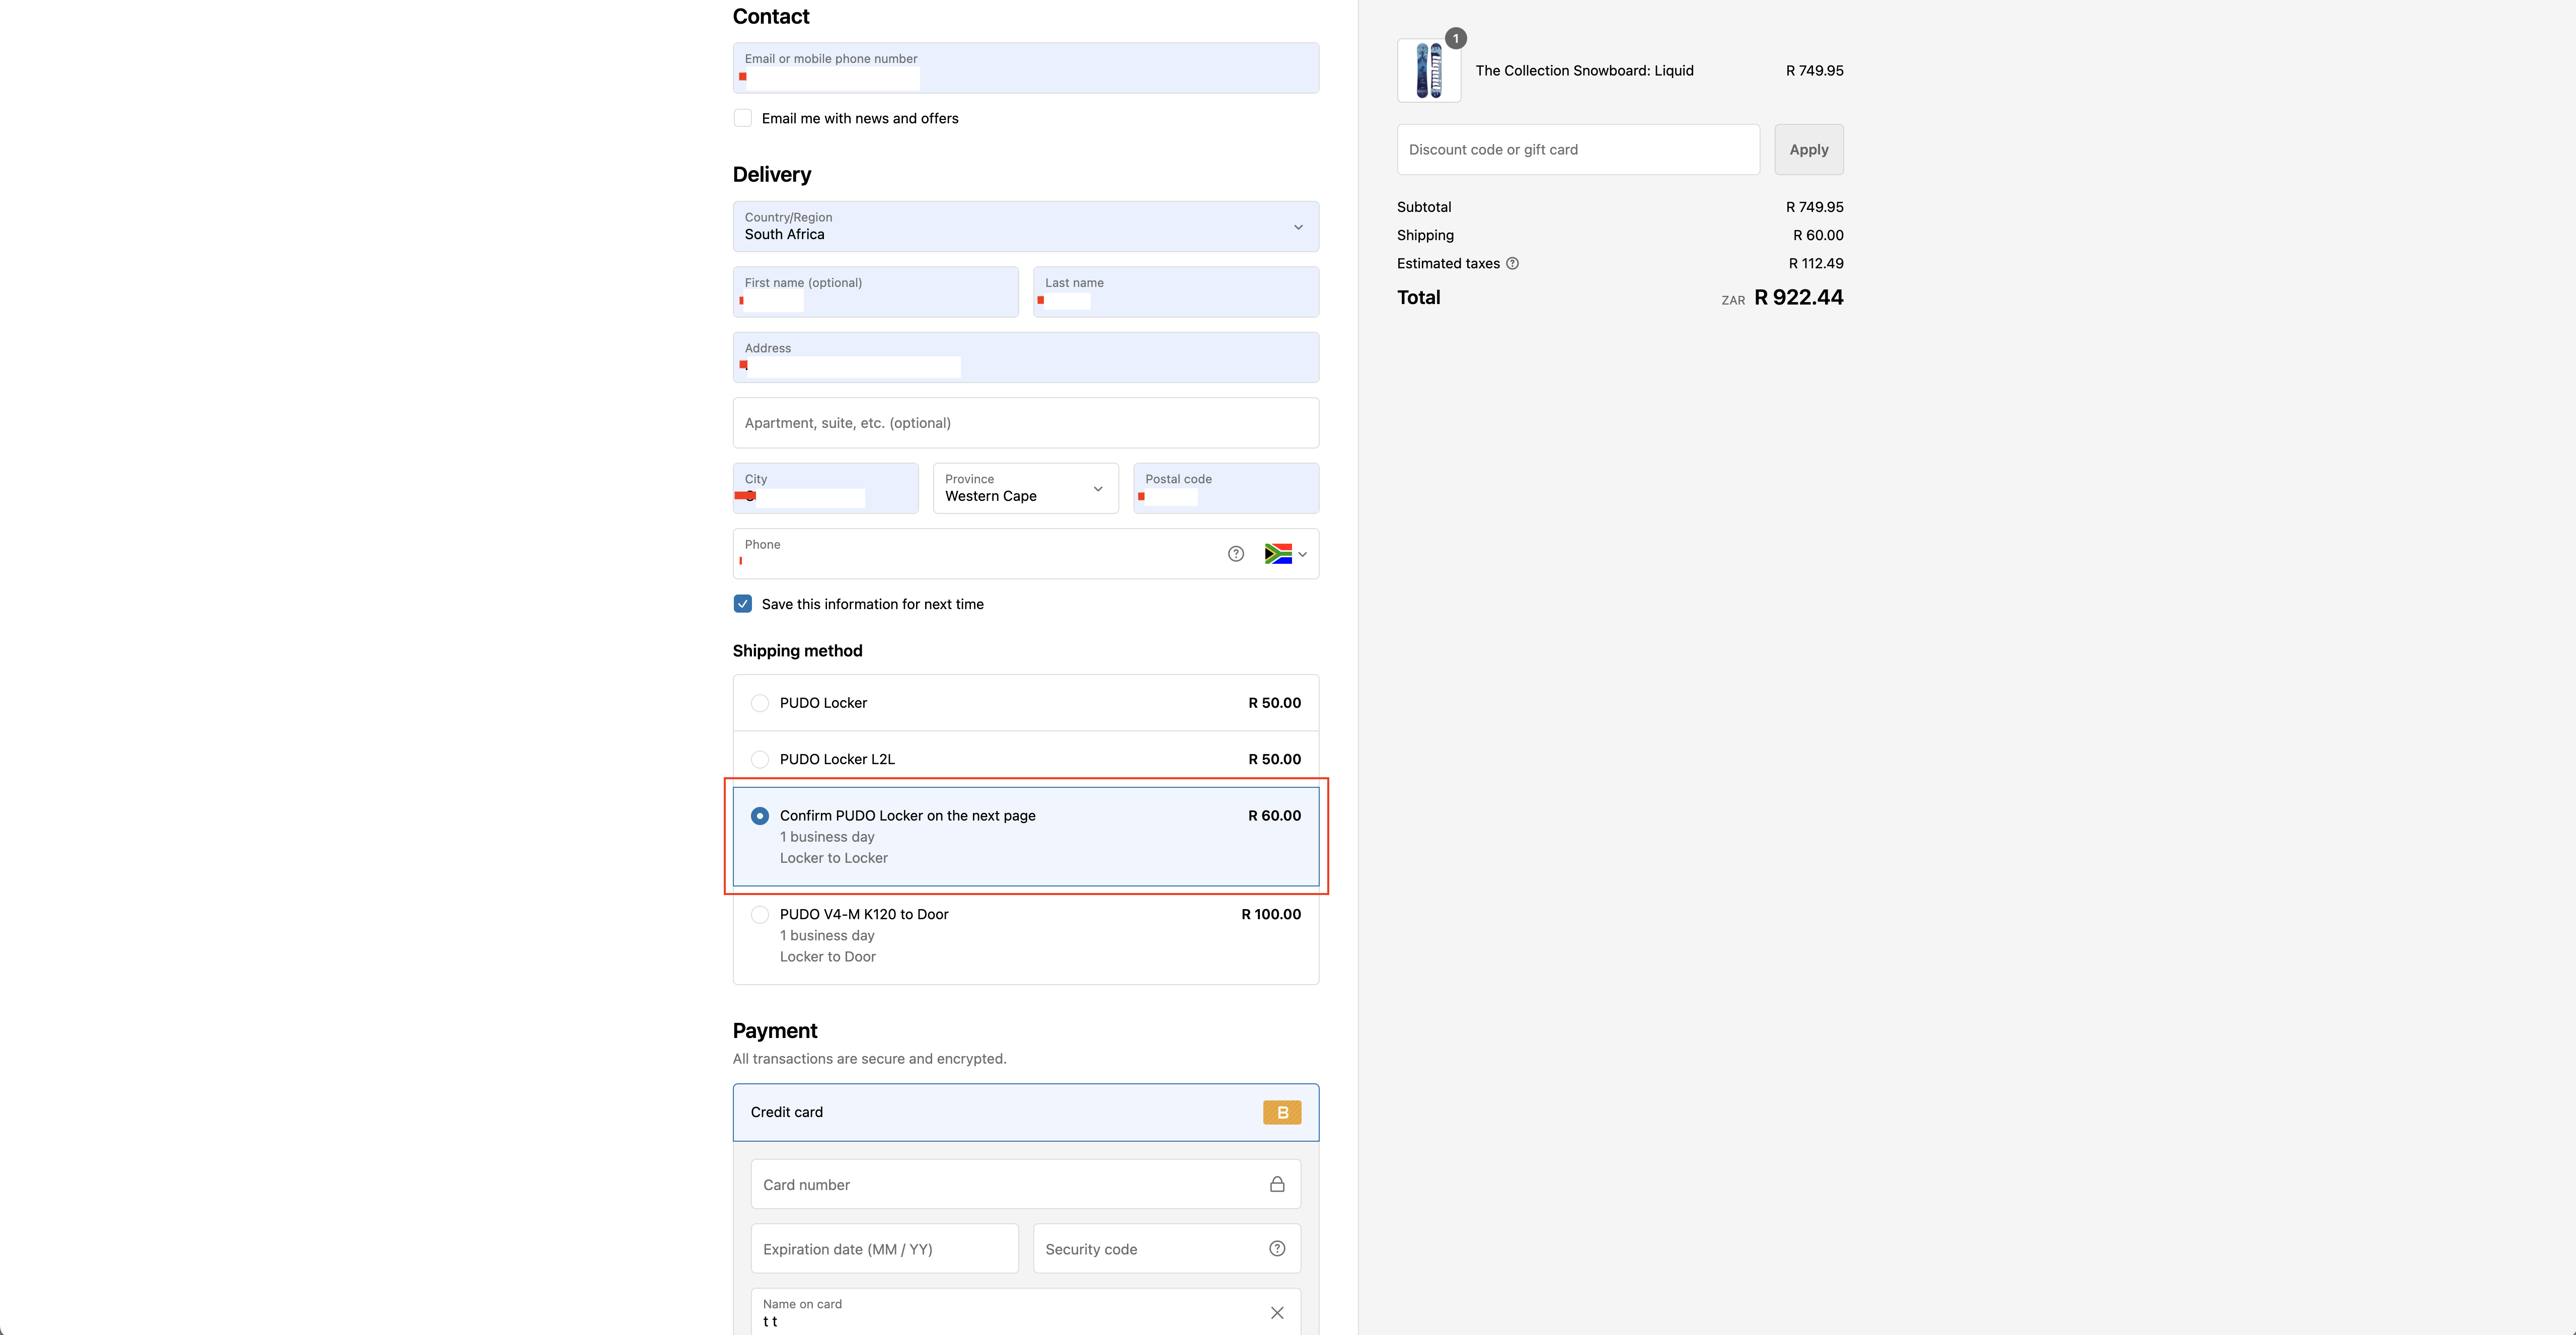
2. Select PUDO Method
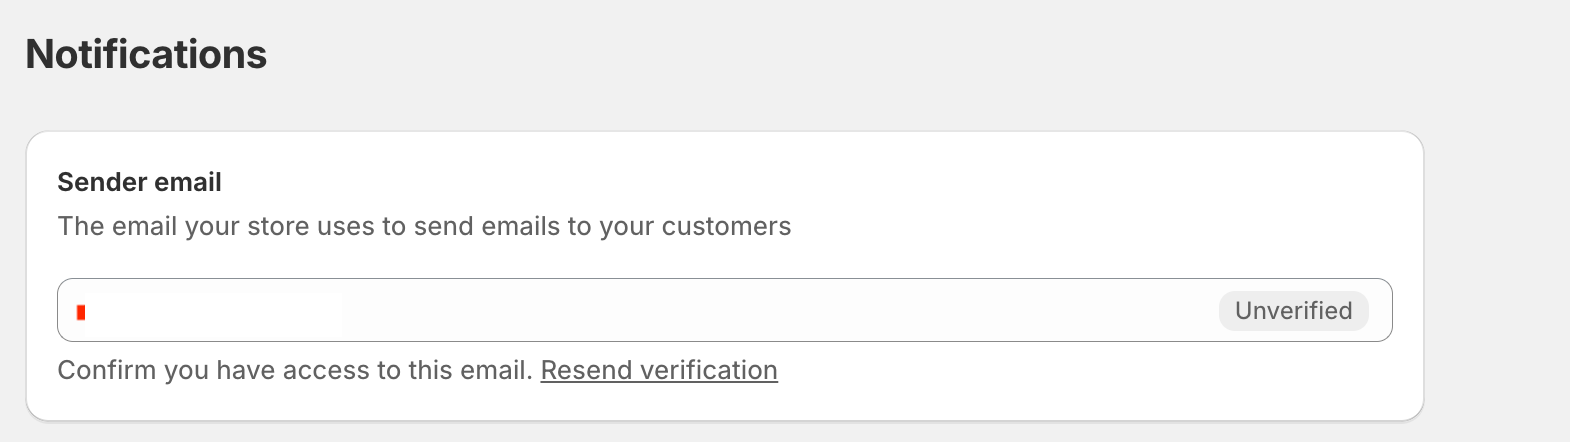
Add your shipping address and select the PUDO method (Confirm PUDO Locker on the next page) at checkout. Ensure you have access to the email used at checkout, as it will receive the OTP pin required to submit your shipment.
3. Complete PUDO Destination Selection
On the Thank You page, navigate to the PUDO Destination Section and click Click here.
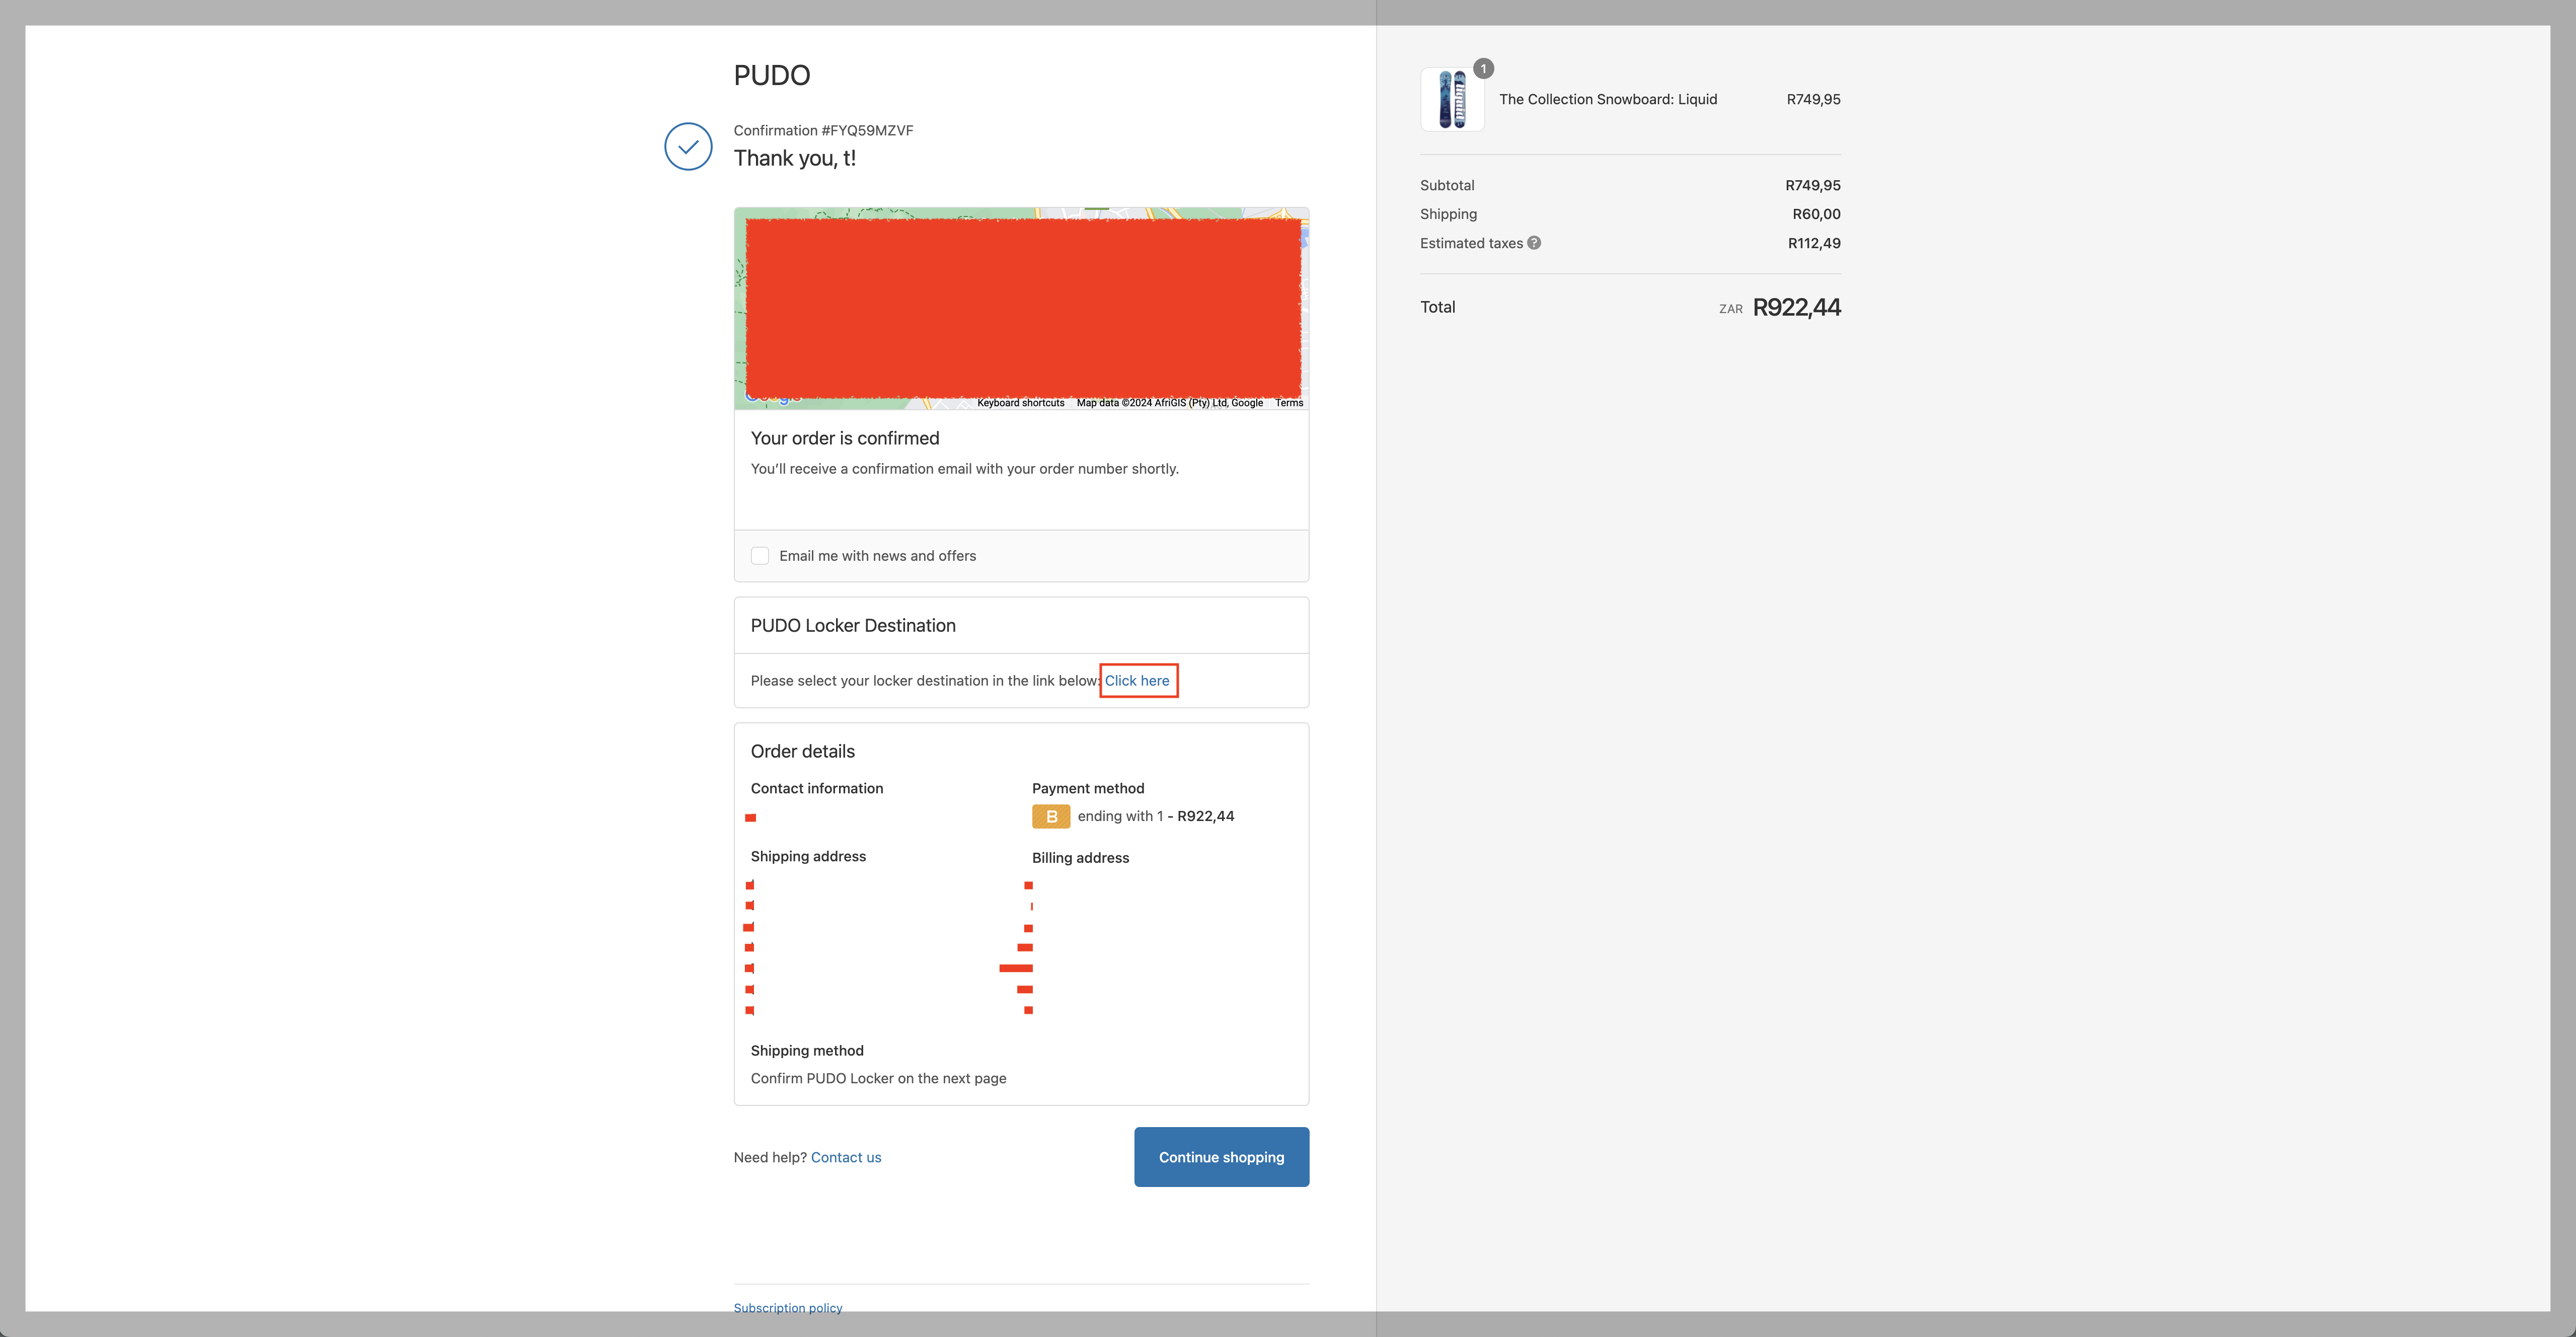
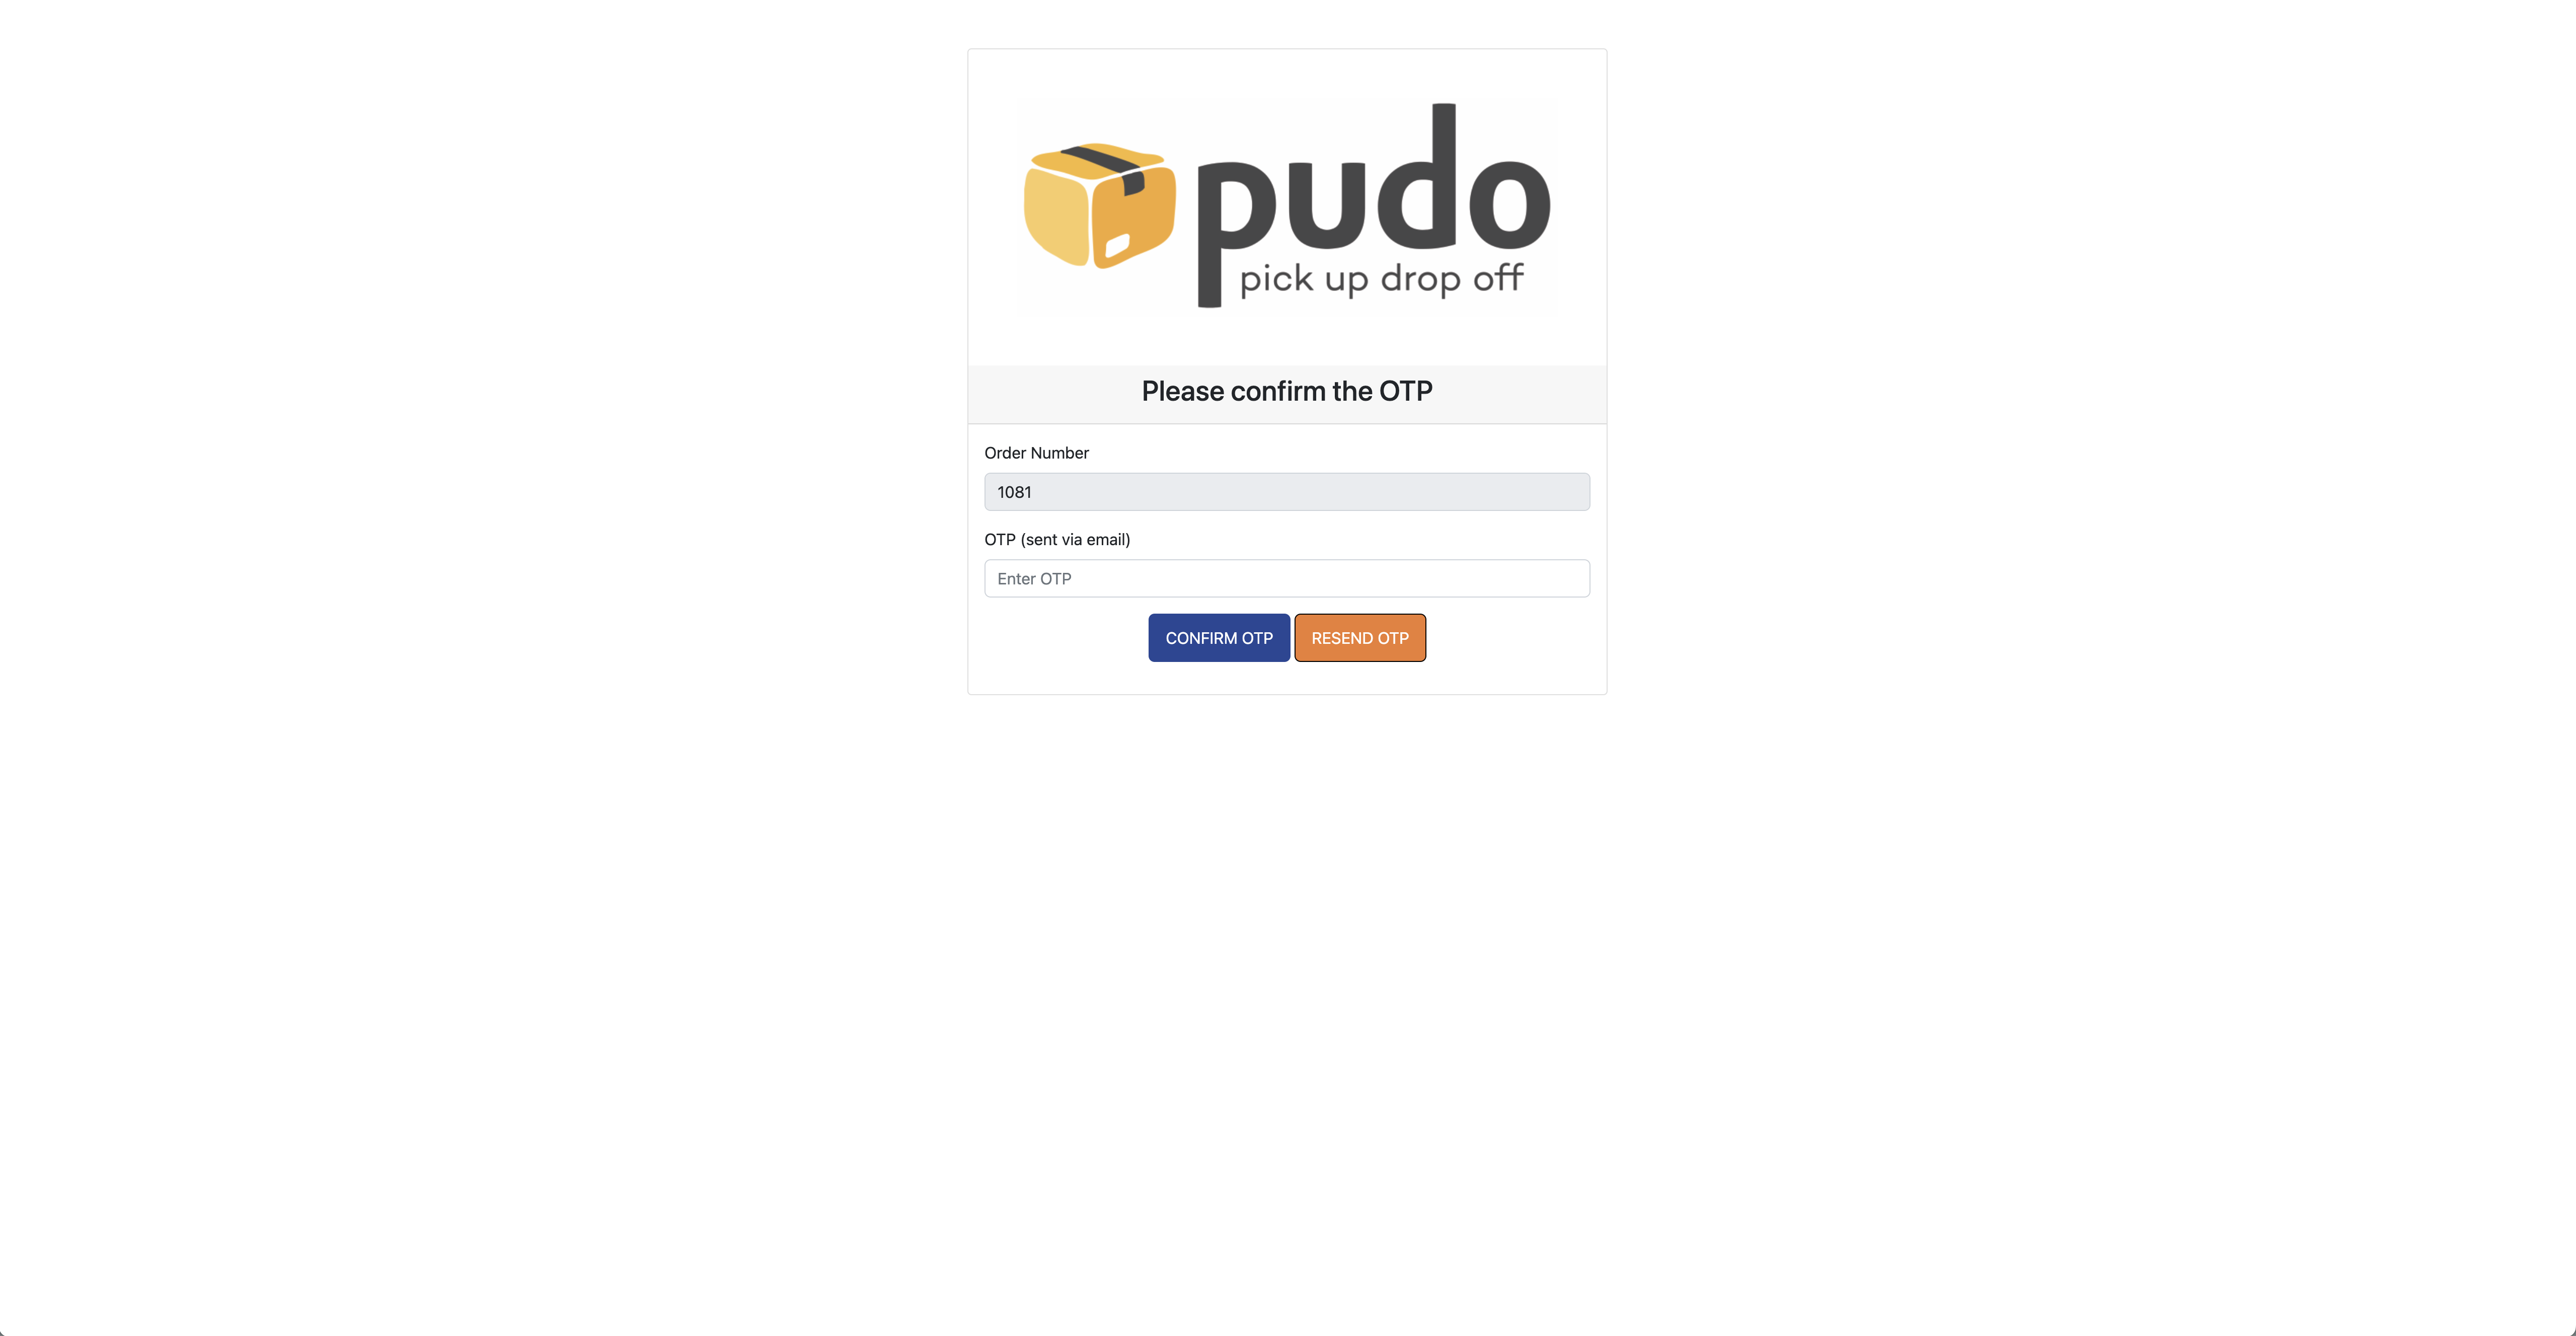
4. Enter OTP and Confirm
Navigate to your email to retrieve the OTP, enter it, select your Locker destination, and click Continue. Alternatively, this process can be done via the order confirmation email.